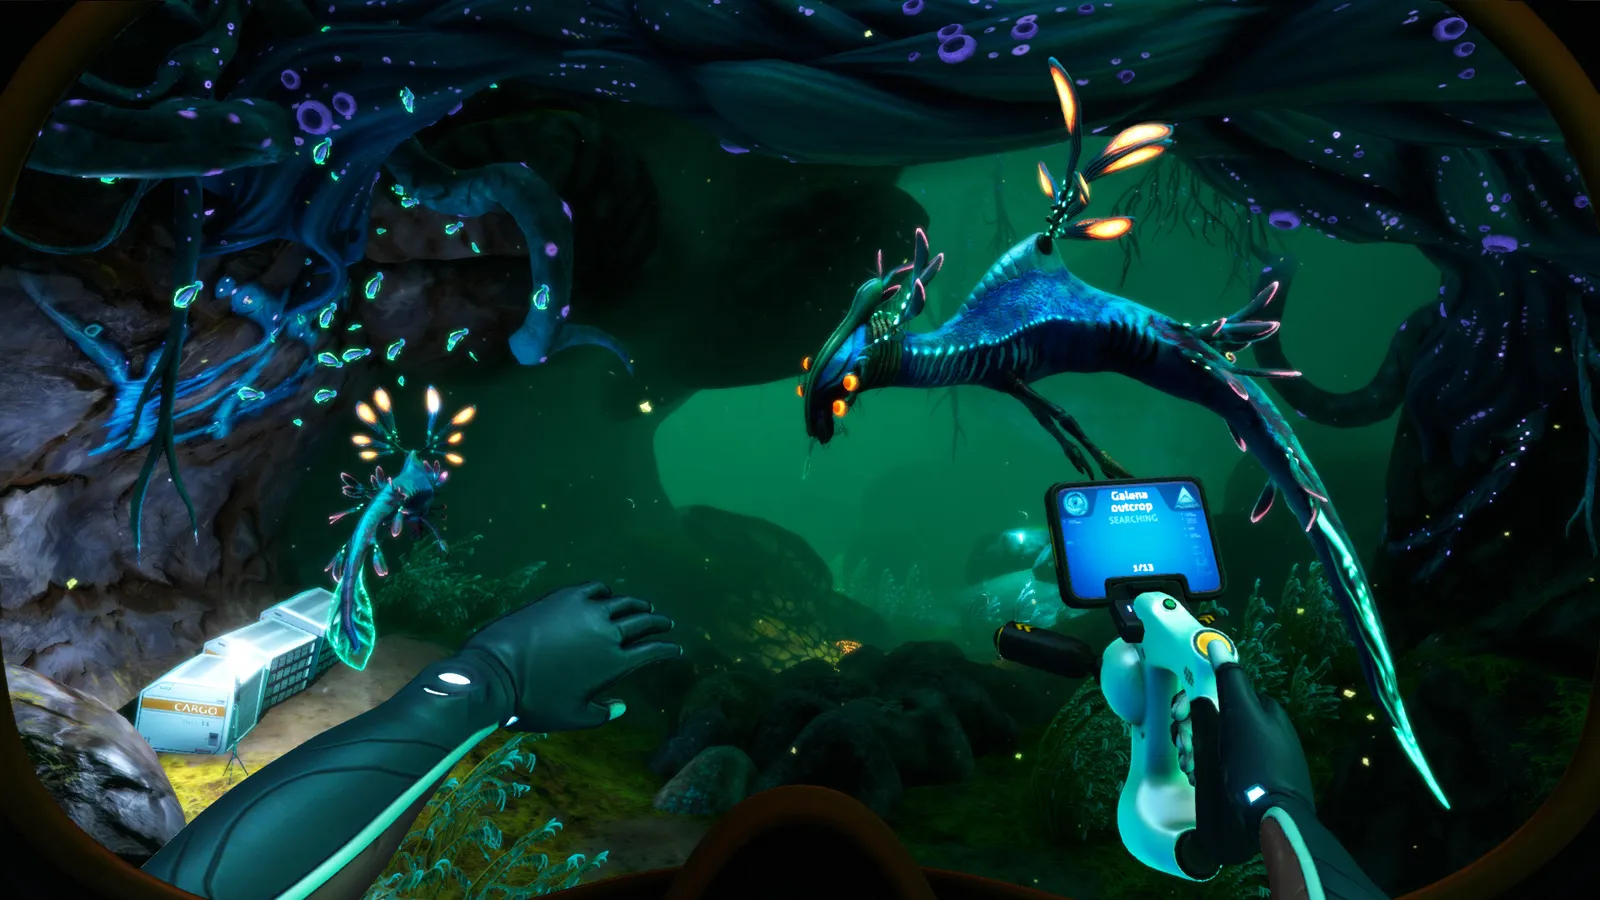
Every leviathan in Subnautica and Below Zero: Reaper, Ghost, Sea Dragon, Sea Emperor, Chelicerate and Ice Worm — locations, stats and how to avoid them.
Subnautica Leviathans — All Types, Locations and How to Survive Them
"Leviathan class" is Subnautica's official designation for the creatures that sit at the very top of Planet 4546B's food chain — and yes, it includes both the ones that eat you and the gentle giants that don't. The original game has seven leviathan species in the crater (Reaper, Ghost, Sea Dragon, Sea Emperor, Reefback, Sea Treader and the cut-content Gargantuan), plus four more in Below Zero (Chelicerate, Shadow, Ice Worm and Ventgarden). This guide covers every species: where they spawn, their exact stats, which ones are actually dangerous, and — for the three that players insist on killing — the proven strategies that work on Reapers, Ghosts and Sea Dragons.
Here's what you'll learn:
- Every leviathan species with its biome, size and health
- Where the 25 Reapers and 3 Ghosts spawn on the map
- How leviathan damage works against the player and each vehicle
- The stasis rifle + gas pods kill strategy and why it's the meta
- Which leviathans are passive and safe to swim near
- How the Below Zero species (Chelicerate, Shadow, Ice Worm) compare
Official resources: Steam store page · Official Subnautica Wiki — Leviathan Class · Official Subnautica Wiki — Reaper Leviathan · Official Subnautica Wiki — Ghost Leviathan · IGN Subnautica page
What Makes a Leviathan a Leviathan?
The PDA's databank is explicit: leviathan class is a size designation, not a threat rating. The category covers any organism approaching the sustainable size limit for life on 4546B — the Sea Emperor and the Reefback are leviathans, and neither will ever hurt you. The practical split players actually need:
| Species | Game | Size | Health | Attitude | Biomes |
|---|---|---|---|---|---|
| Reaper Leviathan | Subnautica | 55 m | 5,000 | Aggressive | Crash Zone, Dunes, Mountains, Bulb Zone edge |
| Ghost Leviathan | Subnautica | 107 m | 8,000 | Aggressive | Grand Reef, Northern Blood Kelp, Crater Edge |
| Sea Dragon Leviathan | Subnautica | 112 m | 5,000 | Aggressive | Inactive Lava Zone, Lava Lakes |
| Sea Emperor Leviathan | Subnautica | 160–200 m | — | Passive | Primary Containment Facility |
| Reefback Leviathan | Subnautica | ~90 m | — | Passive | Grassy Plateaus, Bulb Zone, Grand Reef |
| Sea Treader Leviathan | Subnautica | ~40 m | — | Passive | Sea Treader's Path, Grand Reef |
| Chelicerate | Below Zero | ~50 m | 5,000 | Aggressive | Purple Vents, Tree Spires, East Arctic |
| Shadow Leviathan | Below Zero | 60 m | 5,000 | Aggressive | Crystal Caves, Fabricator Caverns |
| Ice Worm | Below Zero | 95 m | Invulnerable | Aggressive | Arctic Spires |
| Ventgarden | Below Zero | ~200 m | — | Passive | Tree Spires |
Per the official Subnautica Wiki: "Leviathan class species are vast organisms at the top of their respective food chains."
Reaper Leviathan — Where They Are and How to Deal With Them
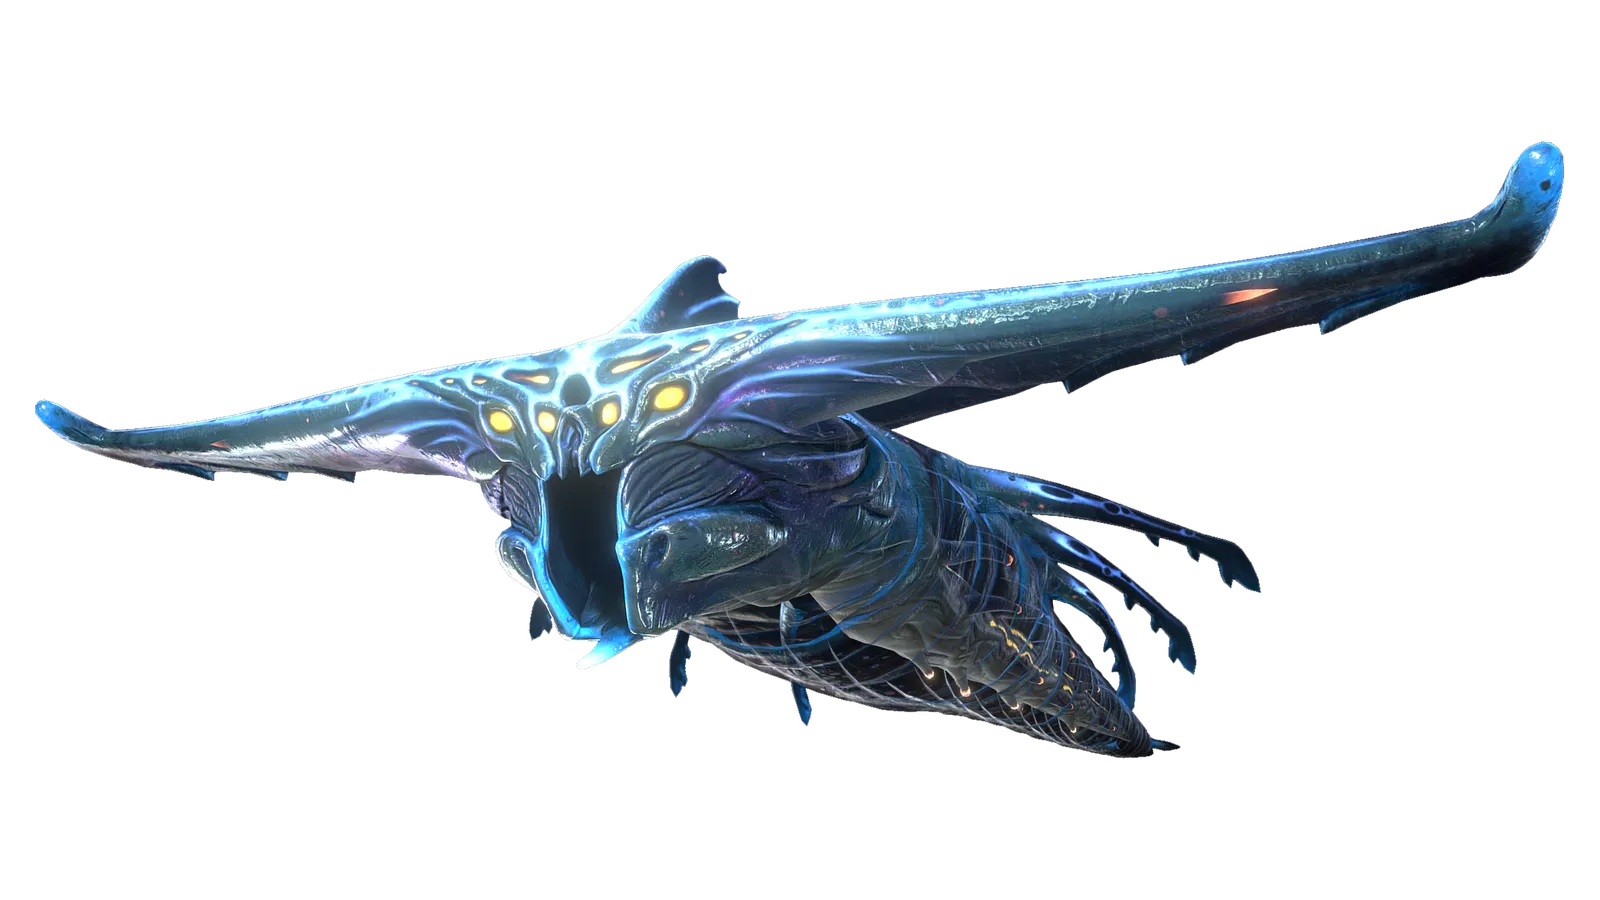
The Reaper is the game's signature horror: a 55-meter red-and-white hunter with four grasping mandibles, a loud sonar-like roar, and the grab attack that ended more first playthroughs than anything else. There are exactly twenty-five Reapers on the map — nine in the Crash Zone, eight in the Dunes, seven in the Mountains and a lone one on the edge of the Bulb Zone — which makes them by far the most populous leviathan species.
Damage profile: 80 to the player per bite (instantly lethal when it triggers the grab finisher), 220 to the Cyclops, 40–60 to the Seamoth, 20–30 to the Prawn Suit. It grabs and shakes a Seamoth or Prawn for 8–13 seconds of continuous damage; it releases instantly if you hit it with a Gas Pod cloud or use the Seamoth Perimeter Defense System. Ten knife hits or five Thermoblade hits make it flee briefly.
Where they actually ambush you: the Aurora's Crash Zone (which is why the ship approach matters — see our Aurora codes guide for the safe route), the Dunes' open sand flats, and the Mountains' drop-offs. The single most dangerous spot is the east side of Mountain Island, where a Reaper patrols the cliff face right where the fragments and shale outcrops are.
The community-standard kill, confirmed across the Steam community guide, GameRant's breakdown and countless r/subnautica threads: collect Gas Pods from Gasopods (the harmless balloon-fish), freeze the Reaper with a fully-charged Stasis Rifle shot, then drop all the Gas Pods in its face and back off while the cloud shreds it. Repeat the freeze if needed. It takes about two minutes per kill with zero personal damage. The Thermoblade stabs into a frozen Reaper's head as an alternative, but gas pods are faster.
If you don't want to kill it, remember the core rule: Reapers attack noise and proximity, not you specifically. A motionless Seamoth with the lights off is ignored; a Prawn Suit walking on the seafloor draws attention from much further away. The full piloting-side tactics for surviving Reaper territory in the Cyclops are in our Subnautica Cyclops guide.
Ghost Leviathan — Locations, Life Cycle and Weaknesses
The Ghost is the creature players search for second most, and it's the one most likely to end a deep expedition, because its spawn points sit right on the routes to the Lost River. Three adults exist in the crater: two in the Grand Reef and one in the Northern Blood Kelp Zone. The Grand Reef pair patrols exactly where you go for rubies, gel sacks and the Deep Grand Reef Degasi base; the Blood Kelp one lurks at the entrance to the Lost River.
Stats: 107 m long, 8,000 health — the second-largest aggressive creature in the game (only the Sea Dragon is bigger). It deals 84 damage to the player, 250 to the Cyclops, 42 to the Seamoth and 14 to the Prawn Suit. Its attack is a spiral-up charge; after a successful hit it usually swims away, giving you a gap.
Life cycle: the Giant Cove Tree in the Lost River is its nesting ground — the glowing bulbs are eggs. It starts as a Ghost Leviathan Juvenile in the Lost River, matures, migrates to open biomes like the Grand Reef, and finally moves to the Crater Edge, the map border, where it roams forever. Enter the Crater Edge and one adult spawns immediately; stay 40 seconds and a second spawns; another 40 seconds brings a third. Kill them and they respawn. The official wiki notes their attacks "are not predatory in nature, but territorial" — the deep adults feed on microscopic life, and they attack you only to defend their domain.
The Northern Blood Kelp Zone ghost patrols the corridor into the Lost River's first chamber. If you dive in a Cyclops with no depth module and no engine discipline, it will slam you into the trench walls. The fix is in the Cyclops guide: kill the engine the moment the sonar turns red, wait it out, and move only at Slow speed. The same trick works on the Grand Reef pair.
Sea Dragon Leviathan — the Lava Zone Apex
Three Sea Dragons exist: two in the Inactive Lava Zone and one in the Lava Lakes. At 112 m it's the largest aggressive creature in the game and the reason the lava zones are endgame-only. It bites (instant kill on the player, 10–20 on the Prawn), swats (250 on the Cyclops), and — the signature move — spits fireballs that start fires inside the Cyclops (500 damage to the Cyclops per hit). It is immune to the Thermoblade.
You will not fight the Sea Dragon to win; you'll avoid it. The Lava Castle interior (where the Alien Thermal Plant sits) and the tunnels to the Primary Containment Facility are the danger zones. Stay low near the lava tube floors, keep the Cyclops engine quiet, and remember the fire-suppression rule from our Cyclops guide: running flank speed overheats the engine, and a Sea Dragon's fireball plus an engine fire is a recipe for a total loss.
Sea Emperor Leviathan — the Gentle Giant
The largest living leviathan in the crater (160–200 m) and the least threatening: it is passive, sapient and telepathic. The lone captive adult lives in the Primary Containment Facility's aquarium, roughly 2,600 years old, and its children are the key to the Kharaa cure. Its story role, the route to reach it, and the hatching enzyme sequence are covered end-to-end in our Primary Containment Facility guide.
How to Kill Leviathans (the Full Toolbox)
If you're going hunting, the effective tools are:
- Stasis Rifle + Gas Pods — the meta. Freeze, drop gas pods, repeat. Works on Reapers, Ghosts and (with more cycles) Sea Dragons. The Stasis Rifle itself costs 1 Computer Chip + 1 Battery + 1 Titanium + 2 Magnetite at the Fabricator; its fully-charged shots freeze leviathans for roughly 10–15 seconds, and its recipe and behavior are detailed on the official wiki.
- Thermoblade — 5 hits make a Reaper flee; sustained stabs into a stasis-frozen head are a classic kill. Useless on the thermoblade-immune Sea Dragon.
- Prawn Suit with Drill Arm — drill the head of a frozen or pinned leviathan; slow but safe in a suit with full depth upgrades.
- Seamoth Perimeter Defense System — not a kill, but it forces a grabbed Reaper to release instantly. The best panic button in the game.
- Gas Torpedoes / Prawn Torpedo Arm — community consensus (see the Reddit kill-strategy threads) is that torpedoes are a waste compared to gas pods; skip them.
Reapers, Ghosts (in the crater) and Sea Dragons do not respawn once killed, which changes the map permanently for a playthrough. That sounds great until you realize you've removed the guard dog that was keeping you honest. Most veterans leave the Crash Zone Reapers alive and just learn the patrol routes. If you do kill, the Dunes' eight Reapers are the least consequential to remove.
Below Zero Leviathans
Below Zero fields its own apex predators, and they hit differently because your vehicle is the Seatruck, not the Cyclops:
- Chelicerate (5,000 HP) — a crimson arthropod predator patrolling the Purple Vents, Tree Spires and East Arctic. It deals 75 to the player and 15–30 to the Seatruck. The Purple Vents one is a rite of passage; it guards the route to the southern map.
- Shadow Leviathan (5,000 HP, 60 m) — the Crystal Caves and Fabricator Caverns menace, two per area. It's relentless and the reason the endgame caves demand full Seatruck depth upgrades plus nerves.
- Ice Worm (invulnerable) — an ambush predator under the Arctic Spires ice, drawn to vibrations. You cannot kill it; you use thumpers to bait its attacks away from you and keep moving.
- Ventgarden (~200 m) — a passive, whale-like creature rooted to the Tree Spires seafloor, effectively a mobile biome. Harmless.
- Glow Whale — another passive giant in the open ocean around the lilypads, safe to ride.
The Shadow Leviathan and Ice Worm specifics (exact spawn zones, patrol patterns, and the thumper mechanics) are detailed on their official wiki pages and Ice Worm page. For the full Sector Zero geography those creatures patrol, see our Subnautica Below Zero map guide.
FAQ
How many leviathans are in Subnautica?
Seven species in the original game: Reaper (25 individuals), Ghost (3 adults + juveniles in the Lost River + infinite respawns in the Crater Edge), Sea Dragon (3), Sea Emperor (1 + 5 eggs), Reefback, Sea Treader, and the cut Gargantuan. Below Zero adds Chelicerate, Shadow Leviathan, Ice Worm and Ventgarden.
Where do the Ghost Leviathans spawn?
Three adults: two in the Grand Reef and one in the Northern Blood Kelp Zone. Juveniles roam the Lost River, and entering the Crater Edge spawns up to three respawning adults.
How do I kill a Reaper Leviathan?
Freeze it with a fully-charged Stasis Rifle, drop Gas Pods in its face, back off, and repeat until it dies — the community-standard two-minute kill. The Thermoblade into a frozen head works too (5 hits also make it flee). Killed Reapers don't respawn.
What is the biggest leviathan in Subnautica?
The Sea Emperor Leviathan at 160–200 m is the largest creature in the game, but it's passive. The largest aggressive species is the Sea Dragon Leviathan at 112 m, followed by the Ghost at 107 m.
Which leviathans are passive?
Sea Emperor, Reefback, Sea Treader, Ventgarden and Glow Whale are all passive. The aggressive species are Reaper, Ghost, Sea Dragon (Subnautica) and Chelicerate, Shadow, Ice Worm (Below Zero).
Related Guides
- Subnautica Primary Containment Facility Guide — Route and Hatching Enzymes
- Subnautica Grand Reef Guide — Depth, Resources and Dangers
- Subnautica Cyclops Guide — Fragments, Upgrades and Pilot Tips
- Subnautica Aurora Codes — Every Door Code and How to Get Them
- Subnautica Below Zero Map — Biomes, Coordinates & Navigation
- Subnautica Biome Map — Every Biome and Depth Range
Last updated: August 13, 2026.
More Subnautica Guides
Subnautica Alien Containment guide: where to get the blueprint, the 5 Glass + 2 Titanium recipe, how breeding and egg hatching work, and the best fish to breed.
How to enter the Aurora in Subnautica: every door code (1454, 1869, 6483, 2679), the radiation suit requirement, what tools you need and all the loot inside.
All Subnautica Aurora door codes: 1454, 1869, 2679 and 6483, where each code is found, and exactly what's worth looting behind every door.
Subnautica Below Zero map explained: how big Sector Zero is, every biome with depth ranges, key coordinates, navigation tips and the best map mods.
Is Subnautica Below Zero multiplayer? No official co-op — but a full story-synced mod exists for Windows. Plus Nitrox and Subnautica 2's official co-op.
Subnautica Below Zero Picture Frame guide: the 16:9 aspect ratio you need for photos, where to get the blueprint, and how to load custom images.
Official Subnautica Below Zero pictures and 16:9 wallpapers: where to download store screenshots, wiki art and community shots in full HD.
The Subnautica map explained: all 18 aquatic biomes with depth ranges, resources and dangers, plus how to navigate without an in-game map.