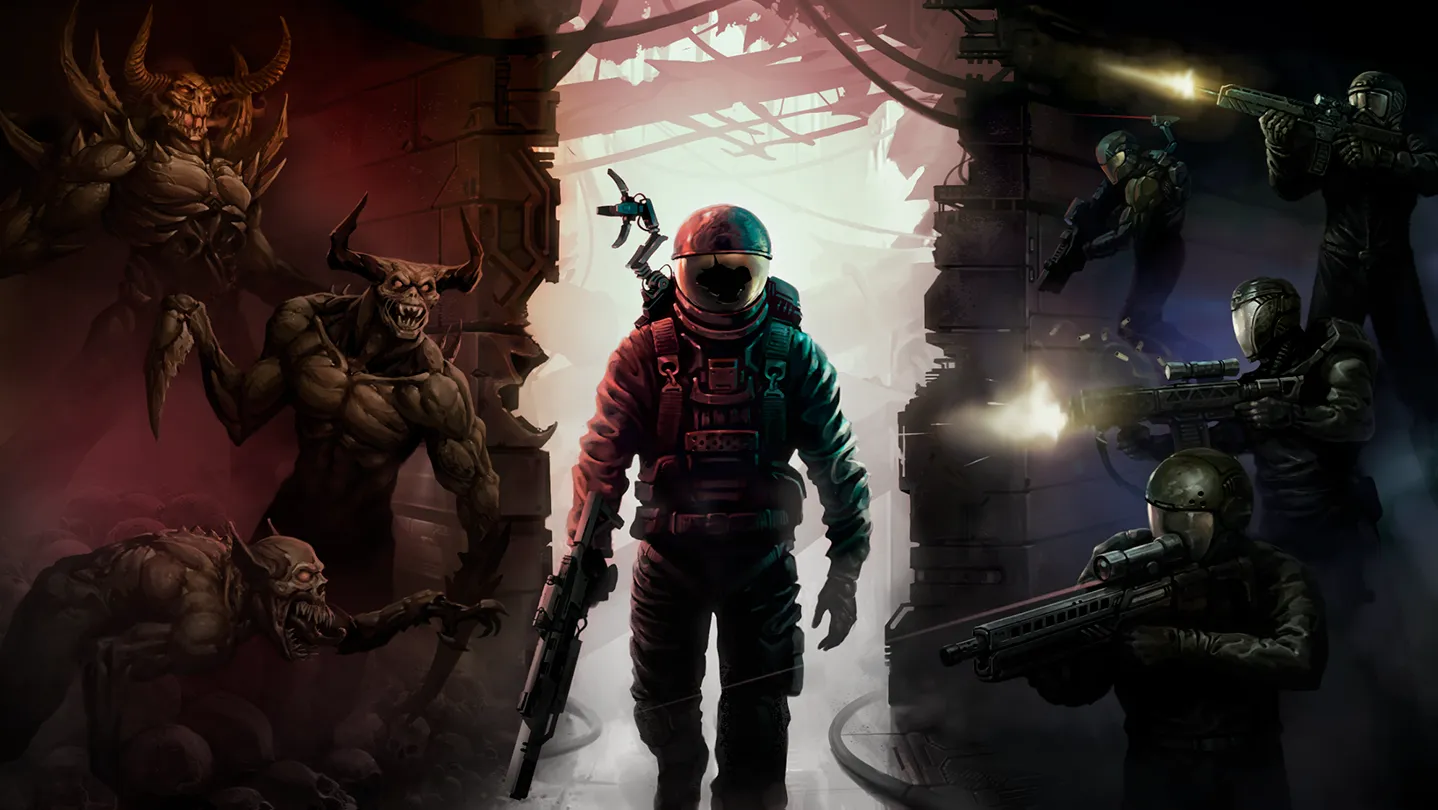
Quasimorph beginner guide for 1.0: master the core loop, starter loadouts, Scouts of Hades class, Mars missions, AP combat, wounds, and extract discipline.
Quasimorph Beginner Guide 2026 — First Contracts, Classes & Survival Economy
Quasimorph is a turn-based extraction roguelike: you send a clone from your ship, the Magnum, into a station, loot and fight, and extract — because anything still on the clone when it dies is gone forever. The 1.0 release (Steam, July 31, 2026) finally answers the question every new player asks: what exactly should I do in my first five hours? This guide walks that opening loop in order — settings, tutorial, class, first contract, loadout, combat, medicine, and when to leave.
The combat guide and extraction guide cover individual systems in depth; this page is the route through them.
Here's what you'll learn:
- The four-beat mission loop (brief → deploy → loot → extract) and why extract is the only moment loot becomes permanent
- Why you should start on Normal, not Unfair, and what the difficulty presets actually change
- The Pine Gap training contract: why it matters and what to take from it
- How classes, operators, and Class Chips fit together, and the safest first pick
- A first-contract checklist that stops you dying to a bad briefing
- A loadout template you can lose without losing your campaign
- Sneak/Walk/Run discipline, wound and infection basics, and the Quasimorphosis meter
- The ten beginner mistakes that end most first campaigns
Official resources: Steam store page · Steam 1.0 release announcement · Getting Started with Quasimorph (wiki) · Official Quasimorph Wiki (wiki.gg) · IGN game page
The Core Loop: Ship, Contract, Station, Extract
Everything in Quasimorph hangs off one loop, and it never changes across the whole campaign:
- Brief and loadout. On the Magnum you open the Stock Exchange screen, read the contract board, pick a job, and equip a clone from the ship's storage.
- Deploy. You land on a procedurally generated station, played turn-by-turn. Action points govern every move, shot, reload, and interaction.
- Loot and objective. You clear or sneak past enemies, search containers, and complete the mission objective.
- Extract. You reach the elevator or shuttle exit. Extraction is the only moment loot becomes permanent.
The penalty loop is the identity of the game: die on station and everything on that body is deleted — items, credits, quest keys, everything. Extract and the haul transfers to Magnum storage, where it fuels barter, crafting, and ship upgrades. As the getting-started guide on the fan wiki puts it, clones are rented bodies, not save-scum checkpoints.
Completing the objective does not bank your reward. If you die walking back, the objective item dies with you — and some story items don't respawn on the same contract rotation. "Is a quest item on this clone?" is the first question before every door.
Difficulty: Start on Normal, Not Unfair
Quasimorph 1.0 offers Easy, Normal, Unfair, and a full Customize screen with sliders. The difficulty settings guide is explicit about the difference:
- Easy — reduced enemy pressure and gentler economy, for players new to AP-based tactics.
- Normal — the baseline the developers tuned for 1.0.
- Unfair — stacked penalties: roughly +2 enemy vision, higher enemy stats, no Production at start, slower crafting, no extraction until the objective is complete, less starting gear, and only two operators instead of four.
- Customize — sliders that generally run from about 50% to 200%, with Normal near 100%.
Per the official 1.0 release announcement, 1.0 shipped five storylines, nine endings, 82 achievements, and 142 pacts on top of the extraction core — the story content is substantial, so you want a campaign you can actually survive into.
Start on Normal for your first full campaign. Easy is fine if turn-based combat is new to you, but Normal teaches the intended 1.0 balance. Unfair is not "the real game" — it is a prestige mode for players who have already mastered the Mars moons and stances. The game itself makes this easy to respect: you can change sliders mid-save in recent builds, so there is no downside to starting mild.
One more difficulty trap: contract skull ratings are not the whole story. Skulls mark intensity within your current campaign settings. True mission difficulty stacks campaign presets, power concentration, faction tech level, and Quasimorphosis pressure on horror stations. A one-skull Normal Mars run with fresh gear can be easier than a three-skull horror contract with an outdated loadout. Don't sort the board by reward — sort it by things you understand.
Your First Hour: Settings and the Pine Gap Training Contract
Before your first real fight, fix the settings that make the game playable:
- Set animation/game speed to 4x and enable fast item transfer (Ctrl-hover). Travel and crafting at 1x is how new players waste real minutes.
- Skip shuttle arrival animations if the option exists in your build.
- Enable alert icons so hostile contact is visible at a glance.
- Subscribe to a handful of factions on the Stock Exchange — subscribing only highlights them, it doesn't lock you in. Picking five employers keeps your reputation math manageable.
Then take the Training Center contract (the community calls it Pine Gap). It is the free-loot tutorial: you clear the Magnum itself, learn movement and combat, and can fill a backpack with starter equipment before anything in the campaign is on the line.
The tutorial is not harmless practice — you can take wounds, lose gear, and die there. Treat it like a real contract:
- Reload before moving into the next room, not after the door opens.
- Never open an unknown door with your final action point.
- Check the mission status (press T) before descending a floor.
- After the boarding fight is over, use Unload All and move every useful item into Magnum storage before you look at the contract board. Tutorial ammo left inside a stored weapon is ammo your next clone can't use.
Doorway discipline and reload timing are the two skills that decide whether you survive your first ten contracts. The tutorial is where they become muscle memory — if you leave it sprinting into unopened rooms, the first Mars firefight will correct you painfully.
Pick a Class and Operator: Scouts of Hades Is the Safe Default
A Quasimorph "class" is a six-perk skill track on top of an operator — a named mercenary with fixed base stats and one unique trait. You pick or change class on the mission prep screen, and switching resets that clone's class experience, so commit once something works.
1.0 opens with two starter classes:
- Scouts of Hades — the ranged generalist. Accuracy and maintenance perks that reward SMG, shotgun, and assault rifle use; reliable early, forgiving rhythm. The classes tier list rates it S-tier for exactly this reason.
- Eclipse Blades — melee burst. Strong once you understand door control and wound risk, but it punishes positioning mistakes that are normal for beginners.
More classes unlock through Class Chips — loot items that drop from missions or can be traded on the Magnum. Right-click a chip on the ship and select Unlock to add the class to your roster.
For the operator, the community consensus is Percy: he ships with broad physical resistances and high durability, which absorbs exactly the mistakes a new player makes. Pairing Percy with Scouts of Hades is the standard first-week recommendation across community guides and the beginner classes hub. The other starters are viable; Percy is simply the most forgiving.
Each class has weapon families it wants to use (Scouts: SMG/shotgun/AR; Eclipse Blades: knives). Running the wrong gun starves your perk XP and makes a strong class feel weak. If the only decent weapon in storage is a shotgun, that's a Scouts-of-Hades contract — not an Eclipse Blades one.
Read the Contract Before You Accept: A First-Contract Checklist
The contract board looks like a reward list. It's actually a failure-prediction list. The fan wiki's choosing contracts guide recommends forcing this order before every accept:
- Beneficiary and victim — who gains if you win, and who you're hurting. This matters for reputation and story later.
- Objective and extract condition — what must be true before extract is legal.
- Time remains vs travel time — can the Magnum arrive before the offer expires? Contracts last roughly 30–50 days, but long trips let faction tech drift upward while you fly.
- Skulls and floors — how long you'll be exposed. More floors means more food, ammo, and horror exposure.
- Station type — industrial sites favor components; research sites favor medical junk. Match the station to what you need.
- Power concentration — a budget for how rich floor loot and enemy spawns can be. Rough gut check: divide power concentration by floors.
- Reward — only after the first six checks pass.
For your first contracts, the golden rules are: stay near the Magnum (Mars, Phobos, and Deimos), prefer two-floor jobs with visible objectives (Elimination, Espionage/Steal), and avoid Defense and long Escort jobs until your kit is stable. Defense missions force you to hold ground against waves — the worst possible classroom for AP discipline.
Also learn the side-switch: every contract has two sides, and mission prep lets you work for the defender instead of the attacker. Sometimes the softer map is the other side of the same contract.
Pack a Loadout You Can Afford to Lose
The single most important loadout rule: don't deploy your only copy of anything. Divide your storage into replaceable gear (craftable, common ammo, duplicates), recoverable gear (one strong gun with a backup path), and campaign-limiting gear (your only rare weapon, ship-upgrade components, story keys). Your first independent contract should be built almost entirely from the first bucket.
A conservative early loadout, in order:
- One loaded ranged weapon — the starter SR-78 rifle (Piercing damage, 7.97 ammo) is the strongest free gun you get; community tests report it around 111% accuracy with 31–45 damage per shot, so treat it as your mainstay while 7.97 ammo lasts. The Hydra-12 pistol (9mm, Blunt damage) is the reliable backup with a cheap reload.
- One compatible ammo stack, plus a second damage type. Resistances apply a flat damage reduction, so a second ammo type covers armored enemies your main gun can't scratch. The rule from the community: take at least two damage types or expect to burn ammo and break guns.
- A melee backup for quiet kills and last resorts.
- Medicine: bandages and splints. Two of each covers the common failure points. Sorbent when you have it — it's craftable on the Magnum and cures infection and poisoning.
- Food and water. Calories drain constantly; running (3 AP mode) burns them five times as fast. Water restores health and puts out fires.
- One empty slot for the mission item, always.
Weight matters as much as what you pack: weight reduces your dodge and increases calorie drain. A hero kit full of armor plates makes you a slow, starving target. Keep one light armor layer and accept that a t-shirt plus decent movement beats heavy armor you can't dodge in.
Move With Purpose: Sneak, Walk, and Run
Quasimorph gives you three movement modes, and they are not cosmetic:
| Mode | AP per turn | Calories | Inventory / interact | Notes |
|---|---|---|---|---|
| Sneak | 1 | Low | Free (zero-cost) | Hidden-enemy detection, silent doors, information mode |
| Walk | 2 | Moderate | Allowed | Default combat rhythm: move-and-shoot, reload, reposition |
| Run | 3 | High (-10/AP) | Blocked | 75% accuracy, escape or confirmed-empty corridors only |
The habits that matter:
- Sneak is your information mode. Use it to open unknown doors (costs 1 AP and avoids the sprint penalty), check containers, and peek corners. It buys vision at the cost of speed.
- Walk is your fighting mode. Two AP means you can step out, fire, and step back — the peek-shoot-hide rhythm that wins rooms.
- Run is for checked routes. Run only through corridors you've already cleared. Run blocks inventory and interaction, so you cannot bandage or reload while sprinting — and it announces you to every patrol in earshot.
If an enemy is on the other side, they act before you can react. Stop one tile short, end turn, watch the enemy phase, then commit. This single habit prevents more early deaths than any weapon choice.
Fight by the Action Points, Not the Ego
Combat is turn-based with strict action economy, and the enemies play the same rules you do:
- Examine enemies first (right-click them). Check resistances, AP, HP, and wounds before firing. A melee enemy with 1 AP cannot catch you if you don't sneak into its face — you can kite it to death through a doorway.
- Kite through doorways. Enemies enter one at a time, so a door is a force multiplier. Step out, shoot, step back. If you take zero attacks per turn, the fight is solved.
- Respect weapon range. Beyond a gun's listed range, damage falls off hard. Keep a short-range and a long-range weapon; mid-range compromise guns disappoint.
- Resistances floor at 5%. Even a fully resisted shot chips a little damage, so a bad matchup is never completely zero — but don't plan around it.
- Guns break. One bullet costs one durability. Carry weapon parts (salvaged from enemy weapons and robots) and repair mid-mission; single-shot rifles outlast multi-shot guns, which is why they're safer early.
- Pain stuns. Take too much damage too fast and your pain threshold fills — you skip a turn. Burst damage can stun an enemy the same way, so finish wounded targets before reloading in the open.
The combat guide covers room clearing and combat stances in full; these are the floor-level rules every beginner needs first.
Wounds, Infection, and the Meds That Fix Them
Hit points are only the first layer of damage. Quasimorph tracks wound states (bleeding, fractures, burns, infections) and pain separately, and untreated wounds kill clones long after the shooter is dead:
- Fractures need splints. A splint stabilizes the wound and heals it over time; keep the fracture icon cleared before pushing floors.
- Bleeding needs bandages (or rags from disassembling enemy clothing, in a pinch).
- Medkits and medbays stabilize broadly. Community guides agree a medkit stabilizes all wounds at once — better than burning five bandages on five wounds. The in-mission autodoc heals everything but has limited charges (refuelable with batteries).
- Infections grow roughly 10% per turn when wounds go untreated, and tick your health away. Sorbents cure 40% infection (and poison and alcohol addiction); antibiotics cure around 80%. Sorbents are free to craft in stacks of ten on the Magnum — always bring a stack.
The triage order when things go wrong: break line of sight, stop life-threatening bleeding, clear pain risk, stabilize multi-wound piles, then re-evaluate whether the objective is still worth the remaining meds. Never open a new door while arterial bleeding is ticking and you have a safe tile and a bandage. If a limb rots and antibiotics are gone, amputation is a legitimate abort-prevention tool — not a build choice.
Community warnings are blunt about this: red-colored armor can hide blood loss on the health monitor, and players have died thinking they were fine. Check the health screen (H) after every heavy hit, even when the bars look healthy.
Quasimorphosis: The Meter You Can Ignore at First
Quasimorphosis is the horror layer: a meter that climbs with time on station and kills, until killed enemies reanimate as quasimorphs and stations stop being predictable. But here's the beginner-friendly part: Mars, Phobos, and Deimos are "Absentia" moons where the meter never accumulates. No horror events, no reanimation, no Baron.
That's why every onboarding path parks you there. Your first five to ten successful extracts should all happen inside the Mars triangle, while you learn AP discipline, inventory Tetris, and extraction timing without a second fail state layered on top.
When you do leave the triangle (story missions will eventually push you out):
- Kills, time, and eating flesh raise the meter; ordinary food and water don't.
- Defense, Control, and Security mission types lock the meter at zero — free reputation farming.
- At the extreme, 1000 Quasimorphosis summons the Baron. Killing it resets the meter to 100 and drops a S.K.U.L.L. skull.
- Cigarettes reduce the meter by roughly 100 each (a full stack covers 1000). Sorbets keep infections — which accelerate on wounded clones — from snowballing.
The Quasimorphosis survival guide has the full system. For the first campaign, the version you need is: stay in Absentia until extraction feels automatic, and treat "extract before 1000" as a rule, not a suggestion.
Extract Discipline: Set the Threshold Before You Land
Extraction is where most beginner clones die — not in the firefight. The mechanics punish greed: calling the elevator takes multiple turns, makes noise, and draws every patrol in the area.
Before you open the first door, set your extract threshold:
- Mission item secured.
- Named Magnum part or Class Chip secured (or clearly absent after a fair search).
- Meds still cover one crisis.
- Quasimorphosis, calories, and ammo still allow a retreat.
When the threshold hits, leave. The optional crate past that point is how full bags become corpse loot. Two mid-mission tools de-risk this further:
- The shuttle — a mobile warehouse on the first floor. Stash spare gear there; items saved persist even if you die later.
- The pod — the emergency evacuation option for ultra-high-value finds. Send the drop that would actually hurt to lose.
Extracting with partial loot is a win. Heroically dying with a full bag is how the extraction guide's loot-priority lectures get written.
Between Missions: What the Magnum Is For
After every extract, hit Unload All and sort the haul: next loadout, progression reserve (chips, story items, ship components), barter stock, and dismantle pile. Then ask what actually limited the last run — and spend on that bottleneck.
The upgrade priorities for a first campaign, per the Magnum upgrades guide:
- Navigation — locked map nodes block every other plan; one or two tiers lets you reach stations on purpose.
- Scanner and Monitoring — mission intel before launch and a legible contract board. If you can't read why a contract is dangerous, upgrade Monitoring before you buy another gun.
- Supply (Conveyor) — production throughput refills medkits, bandages, splints, sorbets, and ammo after wipes. The first Conveyor starts with one production and one queue slot — install it when you have the Welder, and queue Sorbent.
- Engineering and Research — bench tiers and recipes, once Navigation opens the stations that drop rare inputs.
- Hangar (Capsule slots, shuttle rows), Cloning, and the Pact Department — later, as your campaign expands.
Between missions is also when reputation happens: keep faction reputation above zero, because negative reputation blocks you from visiting that faction's stations and trading. Working for a faction raises its tech and power; working against it raises the gear quality it points at you. The economy guide covers barter, credits, and the stock exchange — for now, just don't tank a faction you might need next week.
Beginner Mistakes to Avoid
- Sprinting every turn. Run announces you and blocks healing; walk or sneak until contact.
- Peeking doors with your last AP. Stop one tile short, end turn, commit next turn.
- Sorting contracts by reward. Read the briefing; the reward column is the last check, not the first.
- Taking Defense contracts with starter gear. Elimination and Espionage until your perks are level 2+.
- One damage type only. Armor resistances will eat your whole magazine. Two types minimum.
- Looting after the alarm. When Quasimorphosis spikes or the objective is secure, extract.
- Deploying your only copy of a rare gun. Duplicates in storage; the campaign continues only if the gear does.
- Skipping the Training Center. Free backpack loot and zero-risk AP practice.
- Ignoring calories. Starvation kills as surely as bullets; match food to floor count.
- Playing at 1x speed. 4x for travel and crafting, slow down only in tense combat.
Frequently Asked Questions
How do I start playing Quasimorph?
Finish the Pine Gap training contract, unload all tutorial loot into Magnum storage, set speed to 4x, subscribe to a few factions, then take a low-floor contract near Mars, Phobos, or Deimos. Those moons have no Quasimorphosis, making them the intended beginner sandbox.
Which difficulty should a beginner pick in Quasimorph?
Normal for your first full campaign — it's the balance 1.0 was tuned around. Easy if turn-based AP combat is brand new to you. Skip Unfair until you can reliably extract from the Mars moons: it stacks vision, economy, and extraction penalties on top of everything else.
Which class should I pick first in Quasimorph?
Scouts of Hades — the ranged generalist starter, rated S-tier for early progression in our classes tier list. Pair it with the operator Percy (tanky, high resistances) and an SMG, shotgun, or assault rifle. Eclipse Blades is the melee alternative once door control feels automatic.
What happens if I die in Quasimorph?
Everything the clone was carrying is lost — items, credits, quest keys. Operators, Magnum storage, ship upgrades, and previously extracted loot persist. Unfair difficulty also costs you a chip to re-print operators and blocks extraction until the objective is done. Extract before risky rooms is the whole game.
Where should I do my first missions in Quasimorph?
Mars, Phobos, and Deimos — the Absentia moons with no Quasimorphosis. Stay local, prefer two-floor jobs with visible objectives, and don't make long interplanetary trips until Navigation and Supply can support them.
How long does it take to get good at Quasimorph?
Most players report the first five to ten extracts are the hump. Once doorway kiting, two damage types, and extract thresholds are habits, Normal-difficulty Mars work stops feeling dangerous — the campaign walkthrough is where the real difficulty begins.
Related Guides
- Quasimorph Classes Tier List — Best Operators & Class Chips
- Quasimorph Extraction Guide — Extract Discipline & Keeping Loot
- Quasimorph Combat Guide — Stances, AP Economy & Room Clearing
- Quasimorph Economy Guide — Barter, Factions & Stock Exchange
- Quasimorph Magnum Upgrades Guide — Priority Rooms & Storage
- Quasimorph Quasimorphosis Survival Guide — Managing Horror Meters
Last updated: August 20, 2026.
More Quasimorph Guides
Quasimorph pacts guide: S.K.U.L.L. Project explained — 142 pacts, how to sign them (Baron skulls at 1000 Quasimorphosis), rites, pact families, best pacts.
Quasimorph weapons guide: all ranged and melee classes, the 12 ammo families, top picks like AMW-Snow Wolf and AAD-Barracuda, and how to get them.
Quasimorph 1.0 update guide: everything the full release added — 29 guns, 142 pacts, 9 endings, achievements, mod manager, trade shuttle rework, and hotfixes.
Quasimorph achievements guide: all 82 Steam unlocks with global rates, hidden achievements, the hardest trophies, and a sane 100% completion order.
Quasimorph AnCom storyline guide: how to unlock the syndicate arc with the starting Secret Data, its 2 endings, Phase Bomb access, and Class Chip strategy.
Quasimorph augmentations guide: bionic sets, quasimorphic implants, all 9 body slots, stat matrices, Magnum unlocks, and wound interaction mechanics.
Quasimorph Baron boss guide: what triggers the Rapture, all 9 bramfatura Barons, Teohuatzin mechanics, loadout advice, and proven fight strategies.
Quasimorph campaign walkthrough: how the 5 storylines unlock, route order to all 9 endings, story mission types, and avoiding quest-loot permadeath.