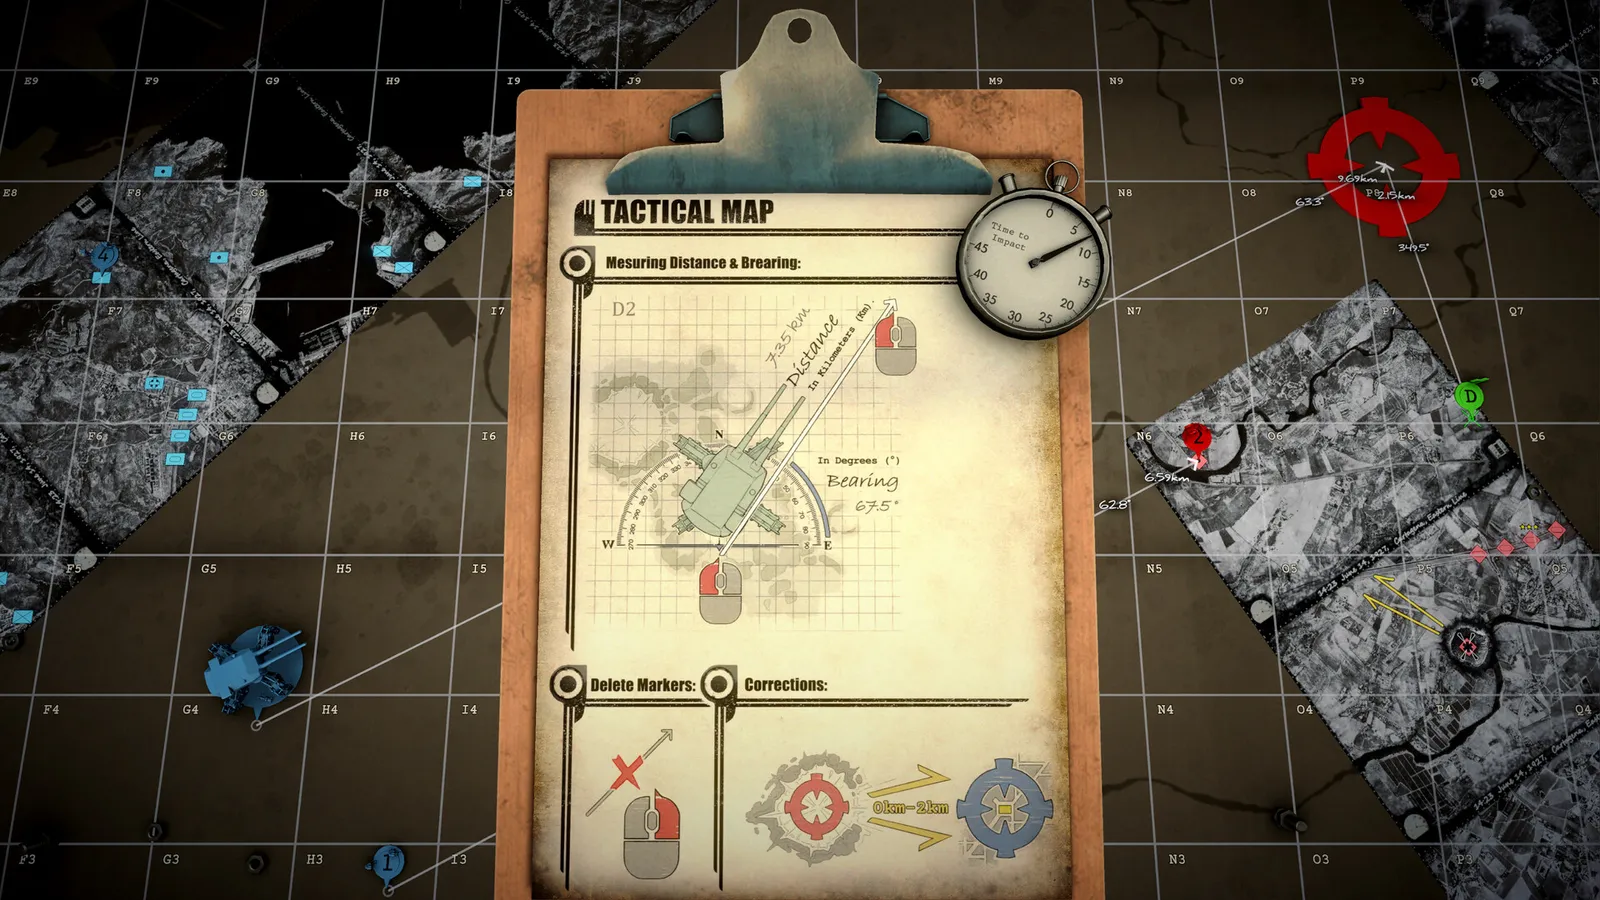
IRON NEST The Gorge (Mission 7): the convoy escort through the Andalucía pass, restarting the damaged Nest, blind-fire corrections, and Gold targets.
IRON NEST The Gorge — Mission 7 Walkthrough, Strategy & Gold Medal
The Gorge is the IRON NEST mission where the campaign finally turns claustrophobic. Mission 7 drops you and the logistics convoy into a mountain pass in Andalucía, your Nest gets knocked into a ravine by an ambush, and you have to fight the rest of the route with a half-repaired machine, firing into terrain that barely gives you line of sight. This guide covers the mission's structure, how to clear the pass, and the exact Gold medal requirements.
Here's what you'll learn:
- Where The Gorge sits in the campaign and what the mission is actually about
- The opening: the ambush, the damaged Nest, and getting power back
- How "observed fire" corrections work when you can't see your targets
- The Gold medal numbers (and why zero ally kills matters)
- The optional rear-guard targets most guides skip
Per the official Steam store page, IRON NEST puts you inside a colossal war machine: "Take map measurements based on the received coordinates, strain the hydraulics, and gunlay the cannons to unleash devastating blows."
Official resources: Steam store page · Destructoid — all Gold medal requirements · IGN game page · Official site
Where The Gorge Fits in the Campaign
The Gorge is Mission 7 of 15, immediately after the Siege of Cartagena and before Rock of Gibraltar. The campaign table in our missions guide shows the context: by this point the Iron Nest is deep in enemy territory, requisition is getting tight (the mission starts with 200 requisition), and the shell grants you banked early are gone — you're buying what you fire.
Narratively, the Nest and its convoy are pushing through a mountain pass bound for the strait (the Gibraltar run that sets up Mission 8). The ambush that sends you into the ravine is the mission's opening beat, and the rest of the map is the narrow gorge itself — which is the whole point.
The Opening: Ambush, Ravine, Power Back
The mission starts with a scripted sequence: the column takes fire in the pass, the Nest takes a hit and falls down the ravine. From the gameplay reports of full runs, the flow is:
- Survive the initial contact — the column guard clears the immediate threat
- Restart the damaged Nest — you're on emergency power; restore systems before you can fire
- Get the guns online — power comes back, then it's a normal fire-control loop with a twist
After the restart, the Nest's instruments can misbehave — the mission is built around manual corrections. Confirm your plot twice before spending a shell; in a gorge, a wrong shot hits rock instead of enemy.
Why You're "Firing Blind" in the Gorge
The gorge's defining mechanic is poor observation. Steep walls break line of sight, and the enemy packs infantry into dead ground where spotters can't keep a continuous fix. The mission expects you to use observed-fire corrections: fire a ranging shot, read the impact report ("over 0.2 km, target bearing 104"), and walk your fire onto the target — the same discipline the game teaches in Dead Reckoning but without the special shells.
Practical rules for blind fire in the pass:
- Every shell you land reveals scouting info around its impact — use this deliberately to map dead ground
- Star shells are cheap recon — at 1 requisition each they'll point at nearby units without killing anything
- Recon planes are worth it here — the pass is long, and one clean flight down the gorge axis reveals more than ten ranging shots
The full spotting/triangulation method is in our triangulation guide.
The Gold Medal Numbers
Destructoid's datamined medal table (pulled from the game's installation files) gives the exact targets for The Gorge:
| Task | Bronze | Silver | Gold |
|---|---|---|---|
| Allies killed (max) | 2 | 1 | 0 |
| Consecutive kill shots (min) | 4 | 7 | 10 |
| Enemies killed (min) | 10 | 20 | 30 |
| Kills/shot ratio (min, 10 enemies) | 0.8 | 1.5 | 2.0 |
The convoy is in the pass with you. One HE shell dropped on a friendly column can end a clean run. Check every target against the friendly icons before firing — the kill streak and kill-count targets are generous, the friendly-fire limit is not.
For 30 kills with a 2.0 kills-per-shot ratio you need multi-kill rounds: saturating a group of infantry with one HE or super-HE shell instead of single-target shots. Our best shells guide ranks which round types do this reliably, and the achievements guide covers how the medals feed the 100% completion route.
The Optional Rear-Guard Targets
Once the pass is clear and the primary objective completes, High Command explicitly authorizes discretionary fire: secondary enemy elements at the rear of the column are not required targets, but continued fire support is allowed. This is the gold-farming window — if you're chasing the 30-kill / 2.0-ratio targets and fell short during the escort, the rear guard is where you close the gap.
If you already have Gold-level numbers and zero friendly fire, stand down and save the requisition. If you're short on kills, this is the sanctioned place to pad the count — just keep the convoy out of your blast radius.
Is It a Hard Mission?
Players generally rate The Gorge easier than Counter-Battery (Mission 4) and far easier than Dead Reckoning (Mission 9) — the difficulty is environmental, not mechanical. The complaints come from the gold run: the friendly-fire limit plus the 30-kill demand can force a replay if you don't plan the kill order. Replays are cheap though: the mission re-rolls enemy positions, and the pass layout stays the same, so the second run goes faster. For the surrounding missions and how the finale ties in, see our walkthrough and endings guide.
Frequently Asked Questions
What is The Gorge mission in IRON NEST?
Mission 7 of the campaign: the Iron Nest and its convoy escort through a mountain pass in Andalucía after an ambush knocks the Nest into a ravine. You fight the rest of the route with the damaged machine, using observed-fire corrections in terrain with poor line of sight.
How do I beat The Gorge in IRON NEST?
Restart the damaged Nest, use ranging shots and star shells to locate enemies in dead ground, avoid all friendly fire (the convoy is in the pass), then clear the primary targets. Optional rear-guard enemies spawn after the pass is clear.
How do I get Gold on The Gorge in IRON NEST?
Gold needs: zero allies killed, 10+ consecutive kill shots, 30+ enemy kills, and a 2.0+ kills-per-shot ratio. Multi-kill HE rounds and the optional rear-guard targets are how you reach the kill numbers.
Why is my Iron Nest damaged in The Gorge?
It's scripted — the opening ambush knocks the Nest into the ravine. Power back on, get the guns online, and the mission proceeds normally (with heavier reliance on manual corrections).
Are there optional targets in The Gorge?
Yes — after the primary objective completes, High Command authorizes discretionary fire on secondary enemy elements at the rear of the column. They're optional, but they help the Gold kill targets.
Related Guides
- IRON NEST Missions Guide — All 15 Campaign Missions
- IRON NEST Walkthrough — Full Campaign & Every Mission Beat
- IRON NEST Best Shells Guide — Every Shell Type Ranked by Mission
- IRON NEST Achievements & Medals Guide — 33 Steam Achievements
- How to Triangulate in IRON NEST — Find Every Target Easily
- IRON NEST Endings — All 4 Endings & How to Get Them
Last Updated: August 13, 2026
More IRON NEST: Heavy Turret Simulator Guides
IRON NEST Dead Reckoning (Mission 9): why recon shows nothing, Tear Shell reveal logic, three hidden positions, the 1.86 km correction, and War Horn timing.
The IRON NEST demo explained: is it free, where to download it, what's included, how long it takes, and whether progress carries over to the full game.
How to calculate barrel elevation in IRON NEST: the distance-to-charge formula, manual elevation when your computer dies, and the best artillery calculator.
All 4 IRON NEST endings in Mission 15 (White Shells): A City in Celebration, A City Subdued, The Road Not Taken, A City Silent — plus the exact shell choices.
The best games like IRON NEST: PVKK (the genre founder), Gunner HEAT PC, HighFleet, Radio Commander and more artillery/command sims to play next.
How IRON NEST: Heavy Turret Simulator actually plays: the fire-mission loop, ballistics and powder charges, plus counter-battery and Phantom Battery strategy.
How long it takes to beat IRON NEST: the 15-mission campaign, endings, challenge modes, medals, and playtime for 100% completion — plus what slows you down.
Learn how to triangulate in IRON NEST: the War Table grid (A–T × 1–10), reading forward observer bearings, crossing two lines, and placing your target token.