How IRON NEST: Heavy Turret Simulator actually plays: the fire-mission loop, ballistics and powder charges, plus counter-battery and Phantom Battery strategy.
IRON NEST Heavy Turret Simulator — Core Systems, Ballistics & Hard Missions (2026)
IRON NEST: Heavy Turret Simulator is exactly what the name promises: you sit inside a colossal dieselpunk artillery walker and fight an entire campaign from the gunner's seat. No running across the battlefield — you read orders off a teleprinter, plot coordinates on a war table, feed numbers into a ballistic calculator, then physically load, aim and fire a twin 800 mm railway gun. It launched August 6, 2026 on Steam, GOG and Epic for $19.99, and sits at 98% Overwhelmingly Positive across more than 4,000 reviews. This guide breaks down how the whole machine actually works — and how to survive the two missions that end most runs: Counter-Battery and Phantom Battery.
Here's what you'll learn:
- The fire-mission loop that runs every engagement
- Ballistics: powder charges, elevation and the two-gun rhythm
- How the Counter-Battery timer works and how to beat it
- The Phantom Battery (Mission 14) and its hidden artillery
- Whether the difficulty reputation is earned

Official resources: Steam store page · pcgamesn review · Game8 review · Official site
What Kind of Game Is It?
You are the sole operator of the Iron Nest — a 5,000-ton land battleship built from repurposed naval guns, deployed in an alternate-history 1920s Spain where the monarchy is fighting off a rebellion. The developers, two-man team Nick Nieuwoudt and Dominik Latos, describe it as first-person heavy artillery: tactical problem-solving, war-machine management and a story told through orders, newspapers and the choices you load into the gun.
The demo and full release share one critical trait: everything is manual. The target is a set of coordinates, not a glowing icon. As pcgamesn put it, it's "a claustrophobic 9 to 5 where loading 12-foot explosive rounds and triangulating enemy artillery becomes second nature."
Per the official Steam store page: "Take map measurements based on the received coordinates, strain the hydraulics, and gunlay the cannons to unleash devastating blows."
The Fire-Mission Loop (Master This First)
Every engagement runs the same professional sequence, first taught in the tutorial missions on Aranjuez:
- Read the order — the teleprinter gives target coordinates, type and priority
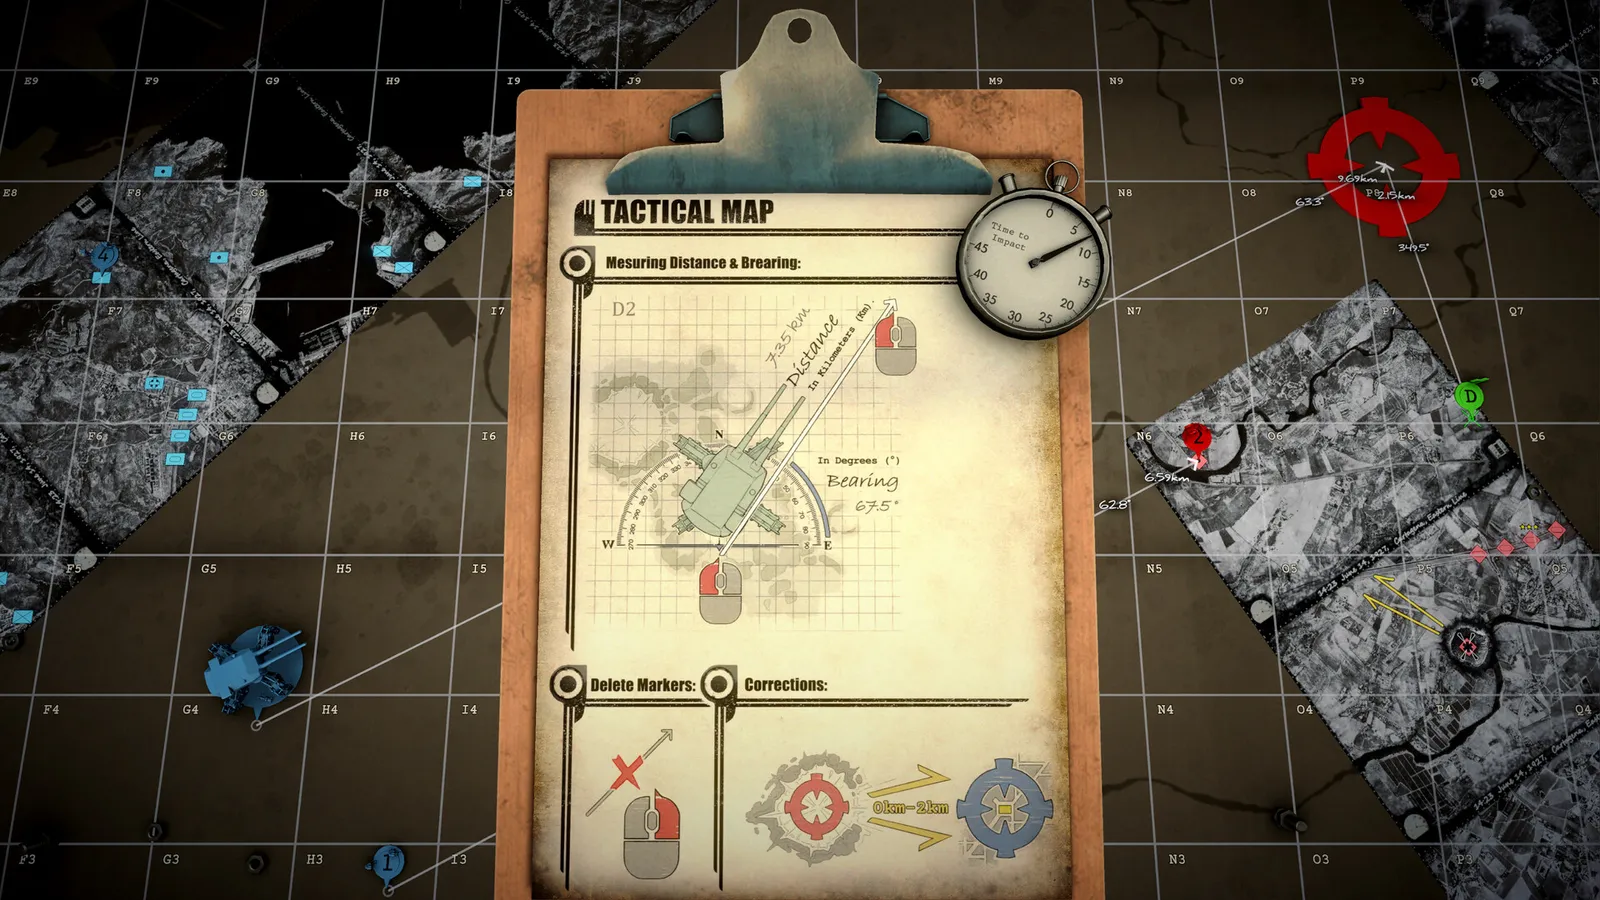
- Plot the map — mark your own position and the target on the war table grid (columns A–T, rows 1–10, with 100 m sub-grids)
- Triangulate — cross spotter bearings to pin hidden targets (full method in our triangulation guide)
- Measure range and bearing with the drafting compass
- Calculate — feed the range into the ballistic calculator for the elevation solution
- Load and prep — pick the shell type and powder charge count
- Rotate, elevate, fire — and use the rotation time to plot the next target
The turret takes a long time to swing between bearings. While it rotates, calculate and write the next firing card on your clipboard. Players who treat the rotation as downtime finish missions in half the time.
Ballistics: Charges, Elevation and the Two-Gun Rhythm
The gun doesn't aim itself. The ballistic calculator turns target distance + charge count into a barrel elevation, and you also set the horizontal bearing yourself. The relationships that matter:
- One powder charge covers roughly 5 km — the calculator asks for more charges as range grows
- More charges = higher arc = longer range; fewer charges = flatter, shorter shots
- Overcharging is a speed trick — using one extra charge than needed lowers the required elevation, and elevation is the slowest control in the turret. Community runs use this constantly (full breakdown in our elevation calculator guide)
- Two guns, one operator — the left and right barrels load independently. Preload both for two targets and you can fire two shells in the time most players fire one
A firing card with the right elevation but the wrong powder charge lands short or sails over. Double-check the physical charge counter before closing the loader — one off is enough to waste the shot.
Counter-Battery (Mission 4): The Timer You Must Outpace
Counter-Battery is the first mission where the enemy shoots back. The rules, confirmed by the developers in the official Steam FAQ:
- The counter-battery timer starts when your first shell lands, not when it fires — so you can put two shells in the air before the clock even begins (300 seconds)
- Destroying enemy artillery extends the timer — community testing reports roughly +30 seconds per artillery kill
- Fire Direction Centers (FDCs) freeze the countdown when destroyed — save them for the end of a volley chain
- Star shells reveal enemies without killing them — they cost 1 requisition and mark nearby units, which is the cheap way to hunt fresh spawns
- The mission isn't over when the opening battery dies — more hostiles, then a fresh battery that old reconnaissance can't show, will follow
The moment the first shell lands, the clock starts. Plot and calculate all three opening artillery positions before pulling any lever — two preloaded guns make the opening volley nearly free.
Phantom Battery (Mission 14): The One That Moves
The Phantom Battery is the campaign's infamous hidden-artillery mission. Unlike the static batteries in Mission 4, this enemy fires, relocates and re-engages — the game even reclassifies it mid-mission as "dispersed battery / mobile heavy rail artillery." The survival loop:
- Find its spotters first — the Phantom's forward observers give it your position; each enemy spotter you destroy adds roughly 30 seconds to the counter-battery clock (per community runs)
- Use the Emergency Move — the Nest can relocate under fire; combine an emergency move with a normal move to confirm your new exact position (the game only tells you where you moved from)
- Recon beats luck — scout plane strips over the suspected sector and cross-spotter bearings are how you pin it down between its own volleys
The dead-reckoning discipline from Mission 9 — where the map actively lies to you — is the training for this one.
Is It Difficult?
The difficulty is real but fair. Early reviews and the 98% Steam rating agree on the shape of it: the process is the difficulty, not reflexes. You die when you forget a step — wrong charge, missed bearing, firing before triangulation. The demo's Counter-Battery mission earned a reputation for punishing players precisely because it compressed the whole loop into a countdown. Take it one step at a time, plan every shot, and the "hardest" missions become procedural. For the full campaign order, see our missions guide.
Frequently Asked Questions
What kind of game is IRON NEST Heavy Turret Simulator?
A first-person heavy-artillery simulation: you operate a giant dieselpunk turret, plot coordinates, calculate firing solutions and load/fire shells by hand through a 15-mission campaign. No combat outside the gun.
How do firing solutions work in IRON NEST?
Plot target coordinates on the war table, measure range and bearing, feed the range into the ballistic calculator, set the powder charge count, then match barrel elevation and rotation to the computed solution before loading and firing.
How do I beat the Counter-Battery mission in IRON NEST?
Pre-plot all three opening artillery positions, preload both guns, fire before the first shell lands to start the 300-second timer late, extend it with artillery kills, and use FDC bunkers to freeze the clock while you clear the rest.
What is the Phantom Battery mission in IRON NEST?
Mission 14: a hidden enemy battery that fires and relocates. Destroy its spotters to weaken the counter-battery threat, use recon to re-pin it between moves, and emergency-move your own Nest to survive its volleys.
Is IRON NEST difficult?
The process is demanding rather than reflex-heavy: missed charges and skipped triangulation kill you, not boss patterns. Planning every shot makes even the hardest missions procedural.
Related Guides
- IRON NEST Walkthrough — Full Campaign & Every Mission Beat
- IRON NEST Missions Guide — All 15 Campaign Missions
- How to Triangulate in IRON NEST — Find Every Target Easily
- IRON NEST Best Shells Guide — Every Shell Type Ranked by Mission
- IRON NEST Dead Reckoning — Mission 9 Guide & Tear Shell Strategy
Last Updated: August 13, 2026
More IRON NEST: Heavy Turret Simulator Guides
IRON NEST Dead Reckoning (Mission 9): why recon shows nothing, Tear Shell reveal logic, three hidden positions, the 1.86 km correction, and War Horn timing.
The IRON NEST demo explained: is it free, where to download it, what's included, how long it takes, and whether progress carries over to the full game.
How to calculate barrel elevation in IRON NEST: the distance-to-charge formula, manual elevation when your computer dies, and the best artillery calculator.
All 4 IRON NEST endings in Mission 15 (White Shells): A City in Celebration, A City Subdued, The Road Not Taken, A City Silent — plus the exact shell choices.
How long it takes to beat IRON NEST: the 15-mission campaign, endings, challenge modes, medals, and playtime for 100% completion — plus what slows you down.
Learn how to triangulate in IRON NEST: the War Table grid (A–T × 1–10), reading forward observer bearings, crossing two lines, and placing your target token.
Every IRON NEST campaign mission in order: Calibration Fire through White Shells, with requisition costs, shell grants, and how to beat the hard missions.
IRON NEST mods: the MelonLoader community, installing mods, the VR/Co-op/PvP multiplayer mod, the IronNestFCS fire-control mod, and mod support status.