
No More Room in Hell 2 tips: the 50% health rule, stamina and grapples, ammo economy, the leg meta, infection treatment, and teamwork that actually extracts.
No More Room in Hell 2 Tips and Tricks — Survive Every Run
No More Room in Hell 2 rarely punishes you for a single mistake in isolation. Instead, early tactical errors compound: sprinting into buildings depletes stamina, leading to un-escapable grapples, infection, and squad wipes. This guide outlines actionable tips covering health thresholds, stamina pacing, ammo discipline, leg dismemberment, and extraction tactics for the 1.0 Armageddon update.

Here's what you'll learn:
- The 50% health rule and how infection risk scales
- Stamina management rules for grapples and shoving
- Ammo economy tricks and magazine check habits
- The leg meta: controlling hordes with dismemberment
- Phalanx Pills vs. Gene Therapy infection treatment
- Teamwork strategies for extraction success
Per the official Armageddon 1.0 update notes, zombie health thresholds are set to 100 HP for Walkers, 70 HP for Shamblers, and 130 HP for Primes.
Official resources: Steam store page · Armageddon 1.0 update notes · Official website · IGN game page
The 50% Health Rule: Heal Early to Prevent Infection
A core rule of survival in NMRIH2: when your health drops below 50%, every zombie hit carries a significantly higher infection risk. At full health, minor scratches rarely trigger infection. Below half health, a single grab can initiate incubation.
Heal immediately when safe rather than waiting until health falls below 20%. Bandages and first-aid kits are common throughout POIs; saving them "for later" often leads to unrecoverable infections.
When your health drops below 50%, fall back behind your teammates, switch to ranged attacks, and call for medical aid before engaging the next horde wave.
For full infection timelines, refer to our dedicated infection guide.
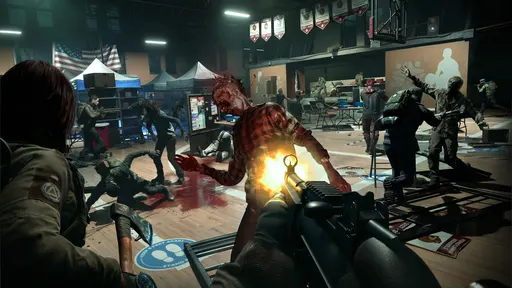
Stamina Management: Sprinting & Grapple Escapes
Stamina governs defensive mobility and melee effectiveness:
- Stop sprinting before entering buildings: Arriving at objective zones with empty stamina leaves you unable to escape zombie grapples.
- Maintain 15%+ stamina reserve: Failing a grapple at under 15% stamina results in a direct bite and guaranteed infection.
Use the shove button (F key) to interrupt zombie lunges. Alternating light melee attacks and canceling swings saves stamina while preserving combat rhythm. New players should consult our beginners guide for movement basics.
Ammo Discipline & Weapon Handling
Firearms are essential for clearing Primes and armored targets:
- Unload scavenged weapons: Guns found in map loot spawn with random ammo loaded. Always strip ammo from unneeded guns before discarding them.
- Check magazine counts manually: Hold R to inspect remaining rounds before opening doors or starting minigames.
- Equip suppressors: Silenced gunfire prevents drawing surrounding hordes. Check official details on Steam store page and IGN game page.
- Match weapon penetration to armor: High-caliber weapons (.308 Win, 6.8x51mm) penetrate military helmet armor where 9mm rounds bounce off.
See our weapons guide for firearm damage rankings.
The Leg Meta: Melee Crowd Control
Targeting zombie legs with sharp cutting weapons (Fire Axe, Machete, Hatchet) severs limbs and converts fast runners into slow crawlers. Crawlers take double damage while downed and cannot sprint, allowing your team to clear them easily.
Crawlers can still swipe at legs if you stand nearby. Use leg dismemberment to create space and buy time during objective interactions, rather than ignoring downed infected.
Infection Treatment: Pills vs. Gene Therapy
When vein lines appear around your screen boundaries, act quickly:
- Phalanx Pills reset the timer: Each bottle contains 3 doses, with each dose buying roughly 5 minutes. Pills delay progression but do not cure infection.
- Gene Therapy provides the cure: Found at major medical facilities, Gene Therapy completely eliminates the virus after a 30-second processing channel.
- Extraction cures infected Responders: Successfully extracting clears all infection status prior to your next run.
On Hard and Nightmare difficulties, permadeath is active from deployment. Protecting an infected Responder takes priority over optional map objectives.
For permadeath difficulty details, check our permadeath guide and survival mode guide.
Teamwork & Extraction Execution
- Assign objective roles: One player completes fuse or wiring minigames while two teammates cover access doors.
- Kite endless hordes: Certain objective events spawn infinite waves until completed. Focus on objective completion rather than clearing enemies.
- Break line of sight: Closing doors behind your squad disrupts zombie pathfinding, allowing you to lose pursuers.
Frequently Asked Questions
What are the best tips for No More Room in Hell 2?
Heal before dropping below 50% health, reserve stamina for shove grapple escapes, unload all scavenged firearms, and target legs to create crawlers.
How do I avoid infection in No More Room in Hell 2?
Maintain stamina above 15% to break grabs, avoid fighting at low health, and take Phalanx Pills immediately upon your first cough.
How do I manage ammo in No More Room in Hell 2?
Unload discarded weapons, check magazine counts manually with R, attach suppressors, and match ammo calibers across your squad.
What is the leg meta in No More Room in Hell 2?
Cutting zombie legs with sharp melee weapons converts fast runners into slow crawlers, taking double damage while downed.
Should I use the Rescue Beacon?
Bring the Rescue Beacon on high-difficulty runs to prevent permanent Responder loss upon death.
What should I do if I get infected?
Use Phalanx Pills to reset the timer, inform squadmates, and push directly for Gene Therapy or extraction.
Related Guides
- Beginner's Guide — How to Play & Survive Your First Runs
- Weapons Guide — Guns, Melee & Best Picks
- Infection Guide — Stages, Pills & Gene Therapy
- Permadeath Guide — Rules by Difficulty & Risk
- Survival Mode Guide — Waves, Maps & Extraction
Last updated: August 20, 2026.
More No More Room in Hell 2 Guides
No More Room in Hell 2 multiplayer explained: 8-player online co-op, squads and private lobbies, matchmaking, voice chat, and playing with friends.
No More Room in Hell 2 permadeath explained: what you lose when a Responder dies, difficulty rules, the Rescue Beacon, and how to keep characters alive.
No More Room in Hell 2 price: $19.49 in the 35% Steam launch sale ($29.99 base), console pricing, Deluxe Edition, Game Pass and microtransactions.
No More Room in Hell 2 on PS5 and Xbox: release date, $29.99 price and PS Plus deal, performance status, controller support, and console-known issues.
Raven Rock walkthrough: the Armageddon 1.0 map's objective chain — bunker entry codes, the director, power, bio-scanners, and the train extraction.
No More Room in Hell 2 release date: Armageddon 1.0 launched Aug 11, 2026 on PC, PS5 and Xbox. Full Early Access timeline from Oct 2024, plus what's next.
Rescue Beacon guide: the Armageddon 1.0 item that prevents a permadeath loss — how it works, Credits/Merits cost, tradeoffs, when to equip.
Can you play No More Room in Hell 2 solo? Yes — 1.0 Solo Mode has zero permadeath and no progression; here's how it works and how to use it.