
No More Room in Hell 2 Survival Mode guide: the 5-minute wave loop, all 3 maps, supply drops, traps, and helicopter extraction rules.
No More Room in Hell 2 Survival Mode Guide — Waves, Maps & Extraction
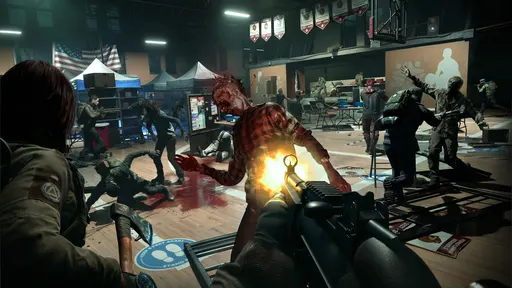
Survival Mode is the headline addition of the Armageddon 1.0 update (August 11, 2026) — a faster, bloodier alternative to the objective-based Scenario mode. Instead of creeping through a map completing generator and fuse objectives, you stand your ground around loudspeaker sets, hold each wave for five minutes, and extract by helicopter after three successful waves. It's the most direct "horde survival" No More Room in Hell 2 has ever been.
Here's what you'll learn:
- Exactly how the wave loop works, from the first supply drop to the helicopter
- The three launch maps — Flooded, Lighthouse, and Night of the Living Dead — and how each changes the fight
- Traps and defensive options that can save a run
- Early extraction rules when things go wrong
- How Survival compares to Scenario mode, and where permadeath fits in
Official resources: Armageddon 1.0 update notes · Steam store page · Official website · IGN game page
How Survival Mode Works
Per the official 1.0 notes, speakers "attract waves of zombies away from population centers and into the waiting arms of combat-focused Responders." The loop breaks down like this:
- Loot and prepare. You spawn with a few minutes to scavenge weapons, ammo, and supplies and set up defenses around the first speaker set. A CRC supply drop is available as a safety net.
- Hold the wave. Once a wave starts, protect the speakers for five minutes while they broadcast. Zombies stream in continuously; the speakers are the objective, not you.
- Breathe between waves. Clear a wave and the CRC drops another supply drop, and you move to the next speaker set with a short pause.
- Extract after three waves. Survive all three and a helicopter arrives to extract you — the run is won.
If your team fails two waves, an early extraction opens as a fallback so the run isn't a total loss.
Per the official Armageddon update notes: "Once the wave starts, players will have to hold out for five minutes against the onslaught to protect the speakers as they broadcast. Each area has special traps and defensive options that can be used when pressure gets too tough."

The Three Survival Maps
Survival launched with three maps, each with three points of interest but very different terrain:
| Map | Setting | How It Plays |
|---|---|---|
| Flooded | A storm-damaged industrial complex in rural Pennsylvania | Multi-floor buildings, ransacked cargo containers, abandoned machinery — and groundwater across the whole map. Zombies are harder to confirm as dead in the water, and dry spots for sharing loot are rare. |
| Lighthouse | A coastal cliffside beacon | A small neighborhood and abandoned construction surround the lighthouse itself, which is packed with tight interior spaces that can turn into kill boxes. Positioning matters more than firepower here. |
| Night of the Living Dead | A classic farmhouse siege | The iconic rural home, expanded with a guest house and a barn. The most traditional horde-defense experience, and the one new players will find easiest to read. |
Survival maps are denser and more chaotic than Scenario maps, but they're also small enough to memorize in an afternoon. Run each one in Solo Mode once to learn the speaker positions and the escape routes before risking a kitted Responder.
Wave-by-Wave Strategy
The rhythm of a survival run changes across the three waves:
- Wave 1 is for economy. Use melee as much as possible, save ammunition, and loot everything around the first speaker set before the broadcast starts. See the weapons guide for which guns are worth carrying into a fight this dense.
- Wave 2 is where runners and specials show up. On higher difficulties the horde composition shifts — Runners and Prime zombies become more common, so keep a loaded gun for anything that closes distance fast.
- Wave 3 is a full commitment. Burn your supply drops, use your traps, and fight with your back to the speakers. If it goes wrong, fall back to the early extraction rather than wiping the squad.
The CRC supply drop between waves is the only guaranteed restock. Grab ammo and medical supplies for the whole squad before anyone wanders off to loot — players who skip the drop often die on wave 3 with empty magazines.
Traps and Defensive Options
The official notes confirm each area has "special traps and defensive options" — environmental hazards, explosive barrels, and barricade points that turn the horde against itself. The update notes also fixed a bug where IEDs did no damage to zombies on Survival maps, which tells you the mode expects you to use explosives liberally.
Practical tips that carry over from Scenario:
- Barricade early, barricade twice. Boards slow the horde down and give the speakers more time. Repairing a door is cheaper than fighting the zombies that would have come through it.
- Use the environment. Explosive barrels and fire hazards thin crowds for free; a well-timed molotov can hold a choke point for a full wave.
- Don't all shoot the same target. Assign lanes — one player handles the approach corridor, another the windows — so nobody wastes ammo overlapping.
Early Extraction and Failure
Fail two waves and an early extraction opens. It works as a damage-control button: get the surviving Responders out with their gear rather than losing them to the horde. The official notes describe it as a way to "prevent disaster," and the extraction tunnel behaves like the scenario-mode escape hatches — see the permadeath guide for what happens if you don't make it.
If you're hunting the Survive Lighthouse achievement (survive that map on Normal or higher), the early extraction is your lifeline on a bad run — the achievement only requires surviving, not three flawless waves.
Survival vs Scenario: Which Should You Play?
| Survival Mode | Scenario Mode | |
|---|---|---|
| Pace | Constant, escalating combat | Slow-burn objective chain |
| Map count (1.0) | 3 dedicated maps | 6 objective maps (Power Plant, Pottsville, Lewiston, Beaulieu Hospital, Broadway, Raven Rock) |
| Core loop | Hold speakers for 3×5-minute waves | Find/install/carry objectives, hold beats, extract |
| Permadeath | Same difficulty rules as Scenario | Same difficulty rules as Survival |
| Best for | Players who want straight-up horde fighting | Players who want tension and exploration |
Both modes feed the same progression, loadouts, and weekly assignments, so there's no reason to pick one exclusively — the multiplayer guide explains how to queue into either with your squad.
Three waves of five minutes plus prep and extraction time puts a typical Survival match in the 20–25 minute range — the same ballpark as a Scenario run. It's the most reliable "one match before bed" mode in the game.
Frequently Asked Questions
How does Survival Mode work in No More Room in Hell 2?
You defend loudspeaker sets that attract zombie hordes. Hold each wave for five minutes, survive three waves, and a helicopter extracts you. Fail two waves and an early extraction opens as a fallback.
How many maps does Survival Mode have?
Three at launch: Flooded (a flooded industrial complex), Lighthouse (a coastal holdout), and Night of the Living Dead (a farmhouse with a guest house and barn).
How long is a Survival Mode match?
Roughly 20–25 minutes — three five-minute waves plus prep time and extraction. It's shorter and more combat-dense than a full Scenario run.
What happens if you fail a wave in Survival Mode?
You can fail a wave and keep going if your team survives. Fail two waves total and an early extraction opens so the remaining Responders can escape with their gear.
What are the best strategies for Survival Mode?
Use melee in wave 1 to save ammo, barricade early, use environmental traps and explosives at choke points, grab every supply drop, and save a loaded gun for Runners and Primes in later waves.
Does Survival Mode have permadeath?
Yes — Survival follows the same difficulty-based permadeath rules as Scenario. On Beginner/Normal you're mostly safe from individual deaths; on Hard/Nightmare your Responder is in danger from the moment you spawn.
Related Guides
- Beginner's Guide — How to Play & Survive Your First Runs
- Multiplayer & Co-op — Players, Squads & Matchmaking
- Weapons Guide — Best Guns & Every Weapon Type
- Permadeath Guide — How Death Works & How to Survive
- Solo Mode Guide — Can You Play Alone?
Last updated: August 14, 2026.
More No More Room in Hell 2 Guides
No More Room in Hell 2 loadout guide: how the system works, Credit costs, unlock rules, what to buy first, and the Rescue Beacon slot tradeoff.
All 9 No More Room in Hell 2 maps: 6 Scenario (Power Plant, Pottsville, Lewiston, Broadway, Hospital, Raven Rock) and 3 Survival maps with objectives.
No More Room in Hell 2 multiplayer explained: 8-player online co-op, squads and private lobbies, matchmaking, voice chat, and playing with friends.
No More Room in Hell 2 price: $19.49 in the 35% Steam launch sale ($29.99 base), console pricing, Deluxe Edition, Game Pass and microtransactions.
No More Room in Hell 2 on PS5 and Xbox: release date, $29.99 price and PS Plus deal, performance status, controller support, and console-known issues.
Raven Rock walkthrough: the Armageddon 1.0 map's objective chain — bunker entry codes, the director, power, bio-scanners, and the train extraction.
No More Room in Hell 2 release date: Armageddon 1.0 launched Aug 11, 2026 on PC, PS5 and Xbox. Full Early Access timeline from Oct 2024, plus what's next.
Rescue Beacon guide: the Armageddon 1.0 item that prevents a permadeath loss — how it works, Credits/Merits cost, tradeoffs, when to equip.