
7 Days to Die base designs: kill corridors, elevated kill boxes, pit and bridge bases, zombie AI pathing, materials, traps, and how to wire lights.
7 Days to Die Base Designs: Horde-Proof Bases and Tips
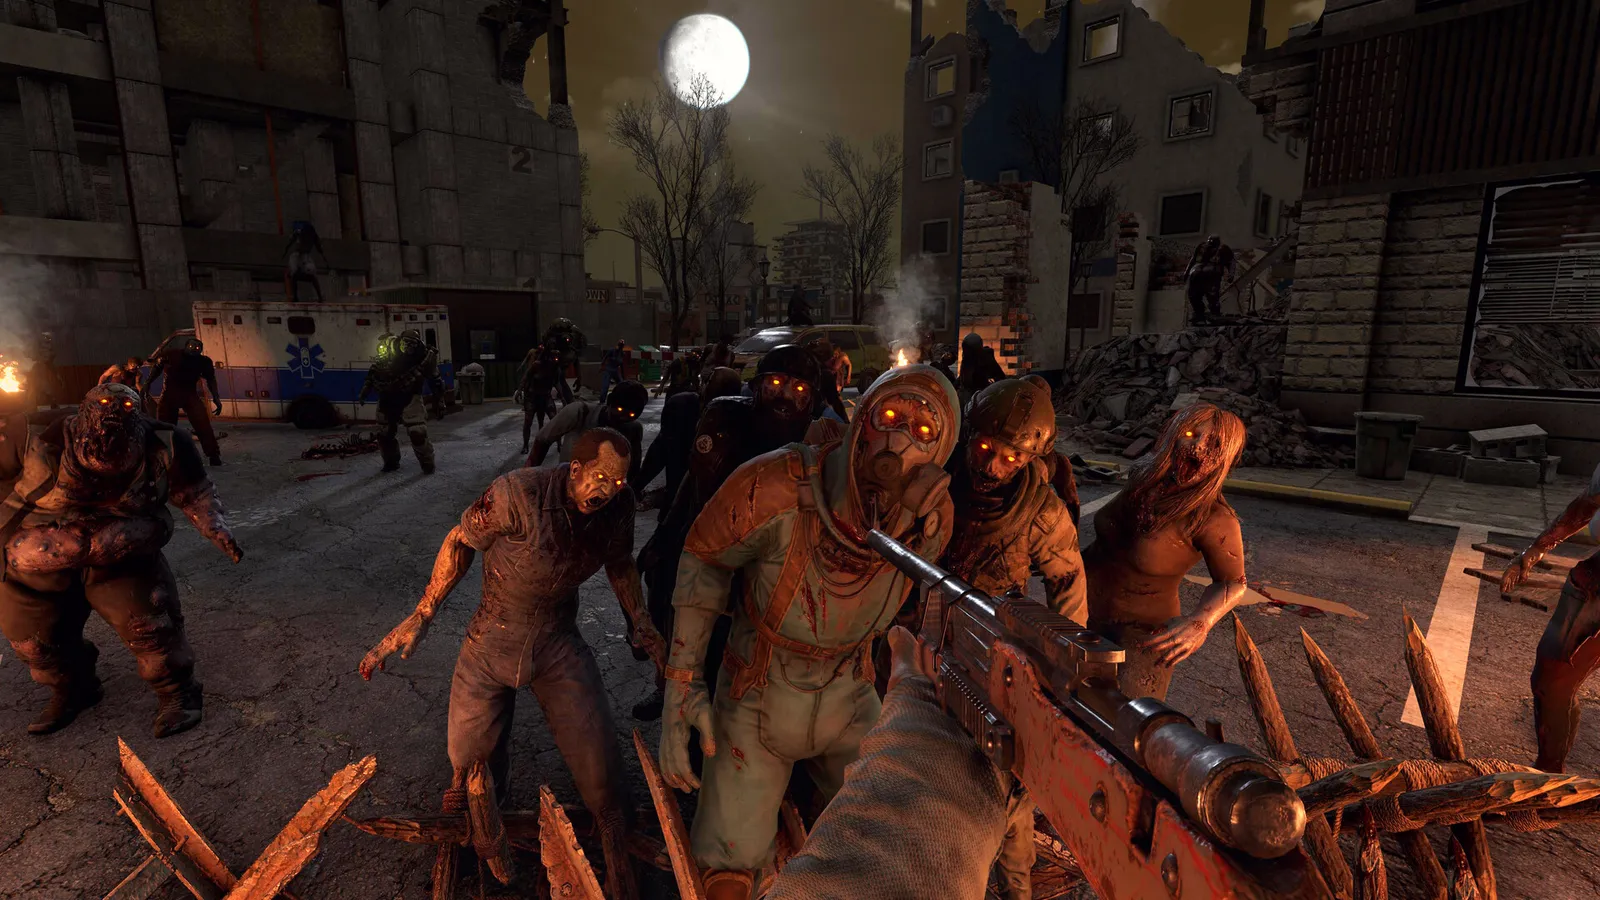
The best horde base designs funnel the entire Blood Moon through one controlled kill corridor: zombies path directly to you, so you give them exactly one path — a 1–2 block wide lane lined with traps — and stand at the far end with a rifle. Every proven design in 2026 — elevated kill boxes, underground pits, bridge corridors — is a variation on that principle plus the zombie AI rule that they attack the block with the highest structural integrity closest to you. This guide covers the design archetypes that survive horde nights, how AI pathing shapes everything, the material math, and the electricity and lighting systems that make late-game bases functional.
Official resources: Steam store page · Official wiki: Electricity · Official wiki: Structural Integrity · Official wiki: Traps · Official 1.0 launch announcement
The Rule That Designs Everything: Zombie AI Pathing
Zombie pathing is the foundation of every good base. Two behaviors define it:
- Pathfinding favors the player. Blood-moon zombies calculate a route to you — vertically first, then horizontally. If a direct path exists, they take it; if you block it, they dig, climb, and beat on whatever stands between them and you.
- They attack the block with the highest structural integrity closest to them. Left uncontrolled, they'll grind your support pillars down to nothing. Controlled — through a deliberate layout — this becomes a funnel.
So the entire art of horde base design is: give the zombies one expensive route, make every other route structurally unattractive or physically blocked, and concentrate your damage output on that single lane. The blood moon guide covers the night itself; this guide covers the buildings.
The Proven Base Archetypes
| Design | How it works | Best for | Weakness |
|---|---|---|---|
| Kill corridor | A 1–2 block wide, roofed lane; zombies file in single-file, traps and you grind them down | Every stage, the community standard | Needs upkeep; collapses if supports die |
| Elevated kill box | A 3×3 concrete/steel box on stilts; zombies climb a deliberate ramp while you shoot from above | Early to mid game | Later zombies climb faster |
| Pit base | A deep hole (4×4, 9+ deep) with reinforced sides; zombies fall and take fall damage (a third of health per fall) | Mid game, ammo-efficient | Cops and spiders complicate it |
| Bridge corridor | A kill lane built on water — one way in, zombies can't flank | Late game, very strong | Expensive to build |
| POI conversion | Take a solid POI (farm silos, water towers, concrete rooftops), seal entries, reinforce the roof | Day 1 starter and beyond | POI interiors can be raided by climbers |
| Bunker | Underground base with a single defended entry | PvP and stealth play | Digging is slow; cave-ins if unsupported |
Build your horde base separate from your main base, roughly 50 meters away, and store your loot in the main base. A horde base is expendable by design — if it falls, you lose a fighting position, not your stash, your forge and your 200-day save. The community term for a dedicated horde structure is the "kill house," and keeping loot out of it is rule one.
Materials: The Math of Not Collapsing
Material tiers decide how long a base stands. Community-standard HP values (verify in-game; exact numbers shift with patches):
| Material | Block HP (approx.) | Horde-safe until |
|---|---|---|
| Wood | ~500–1000 | Day 7 (barely) |
| Cobblestone | ~3000 | Day 14 |
| Concrete | ~5000 | Day 21+ with repairs |
| Steel | ~10000 | The endgame |
The consensus: concrete is the minimum for serious horde play, steel for late-game, and wood/flagstone "will not last past Day 14 hordes." Upgrading block-by-block (wood → cobblestone → concrete → steel) is how you get there — each upgrade also pays XP, so hardening your base doubles as leveling (see the survival guide's XP section).
Structural integrity matters as much as HP: pillars carry weight, and knocking out supports collapses roofs. Watch the block color warnings (orange/red = unsupported) when you dig or expand.
At high game stage, the demolisher zombie carries an explosive backpack that detonates for massive block damage. If one reaches your kill box, shoot the glowing green backpack from range — a single shot to the pack usually detonates it away from your walls. Never let one into a corridor full of traps you paid for.
Traps: The Damage Layer
Traps do the work so your ammo doesn't. The standard 2026 loadout:
- Spikes / barbed wire — cheap perimeter erosion from day 2. Note: kills from some traps don't grant XP; spikes are for defense, not farming.
- Blade traps (~20 W) — the corridor workhorse; line the kill lane with them.
- Dart traps — ranged damage down the lane for reach.
- Electric fence posts (~5 W) — the control tool: they shock and immobilize zombies in place while blades and you grind them down. Fences stall; blades chew; darts reach.
The power math (details below) decides how many you can run: a generator bank feeding blade traps and fences is the difference between "hold a corridor" and "hold a corridor while reading a book."
Electricity and Lighting: How to Run Lights
"How do I run lights in 7 Days to Die?" is the classic wiring question, and the answer is a circuit: power source → wire tool → devices.
- Power sources — a Battery Bank (crafted at the workbench after reading 75× Wiring 101), a Generator Bank (1 engine = 50 W per engine, needs gas), or a Solar Bank (buy from traders, up to 6 solar cells = 180 W). Solar + battery is the self-sufficient late-game combo: solar charges batteries by day, batteries run the base at night.
- The Wire Tool — craft it at the workbench (9 forged steel + 3 mechanical parts — see the mechanical parts guide). Equip it, right-click the power source, then right-click the device to complete the connection.
- The rules — one-in/multi-out: each device has one power input but can feed multiple outputs; only one source powers a circuit; and devices must be within 10 blocks of each other to connect (relays extend that).
- Wattage — add up your devices' draw (ceiling lights ~12 W, motion sensor 5 W, auto turret 15 W, blade trap 20 W, fence post 5 W) and make sure the source covers it. Switches and motion sensors cut draw for resting circuits — a motion sensor that only powers turrets when zombies walk past saves battery for the whole night.
For night visibility specifically: ceiling lights + a switch (or motion sensor) inside your corridors, plus the craftable light attachments covered in the mods guide for your weapons.
Per the official wiki's Electricity page, "all connectable electrical items follow a single-in, multi-out rule" — that one sentence explains 90% of wiring mistakes.
Late-game bases often swap corridors for auto turrets (15 W each) on the flanks so you can hold two lanes solo. Turrets cost ammo like you do, but they aim while you reload — worth the mechanical parts once your resource farm can feed them.
FAQ
What is the best horde base design in 7 Days to Die?
The kill corridor — a 1–2 block wide, roofed lane lined with blade traps and electric fences, with you at the far end — is the community standard for every stage. Elevated 3×3 concrete kill boxes and pit bases are the strong early-game alternatives.
How does zombie AI decide what to attack in a base?
Blood-moon zombies path directly to your position (vertical first, then horizontal) and attack the block with the highest structural integrity closest to them. Good base design exploits this by offering exactly one controlled route.
What materials should a horde base use?
Concrete is the minimum for serious hordes (~5000 HP), steel for endgame (~10000 HP). Wood survives Day 7 at best and cobblestone lasts to about Day 14. Upgrade blocks through the tiers — each upgrade also grants XP.
How do I run lights and electricity in my base?
Build a circuit: a power source (battery/generator/solar bank) → the Wire Tool (right-click source, then device) → lights and traps. Devices connect within 10 blocks (relays extend), one source per circuit, and wattage must cover total draw. Solar + battery banks make it self-sufficient.
Should my horde base be separate from my main base?
Yes — build the horde base ~50 meters from your main base and keep loot, forges and workstations in the main base. A horde base is expendable by design; your stash isn't.
Related guides: 7 Days to Die Blood Moon — horde night guide · 7 Days to Die Singleplayer: How to Survive · 7 Days to Die Mechanical Parts — the resource economy · 7 Days to Die Armor Sets · Conan Exiles Building Materials guide
Last updated: August 13, 2026.
Related Guides
More 7 Days to Die Guides
7 Days to Die creative mode: how to enable it, cm/dm/god/fly commands, the U item menu, giveself spawn commands, and server setup (BuildCreate).
7 Days to Die crossplay guide: PC, PS5 and Xbox Series X|S play together since V1.2. Requirements, how to enable, limits, cross-save truth, troubleshooting.
7 Days to Die Darkness Falls guide: KhaineGB's V6 overhaul, the 8 classes, 96-slot backpack, titanium and laser tech, and how to install it.
7 Days to Die maps explained: Navezgane cities and POIs, random-gen world sizes (4K-10K), Pregen maps, teleport commands and console map differences.
7 Days to Die maps guide: Navezgane and its biomes, random gen, pregen sizes 4K-16K (including the A20 10k map), Bob's Boars location, and PS4 legacy maps.
How to get mechanical parts in 7 Days to Die: salvage list (wrench/ratchet), cars and engines, scavenge spots, perks, trader buying, and every crafting use.
Best 7 Days to Die mods 2026: QoL picks (Bigger Backpack, HUD Plus, SMX), EAC-friendly server-side mods, Rebirth, in-game flashlight mods and how to install.
7 Days to Die Mod Launcher guide: what the 7D2D Mod Launcher (V5) does, profiles and isolated installs, the Nexus Mods workflow, and how to mod the game safely.