
Helldivers 2 stratagems explained: the full list by permit type, how codes and call-ins work, unlocks, ship modules, and the best picks per faction.
Helldivers 2 Stratagems — Full Guide: Unlocks, Codes and Best Picks
Stratagems are Helldivers 2's most important system: four loadout slots for orbital strikes, Eagle airstrikes, support weapons, sentries, vehicles and mission tools, each called in by typing a directional code and throwing a beacon. There are more than 80 in the game by mid-2026, spread across four permit types — Offensive, Supply, Defensive and Mission — and they're unlocked with Requisition Slips and levels in the Patriotic Administration Center, through Warbonds, and upgraded further with Ship Modules bought using samples. Getting the system right matters more than your aim: a coordinated stratagem loadout is what separates a squad that extracts from a squad that becomes bug food.
This guide covers everything: how the call-in mechanic works (including the codes), the complete category breakdown, the full unlock economy (requisition slips, medals, samples, super credits), Ship Module priorities, and the best stratagems for beginners and for each faction — bugs, bots and squids.
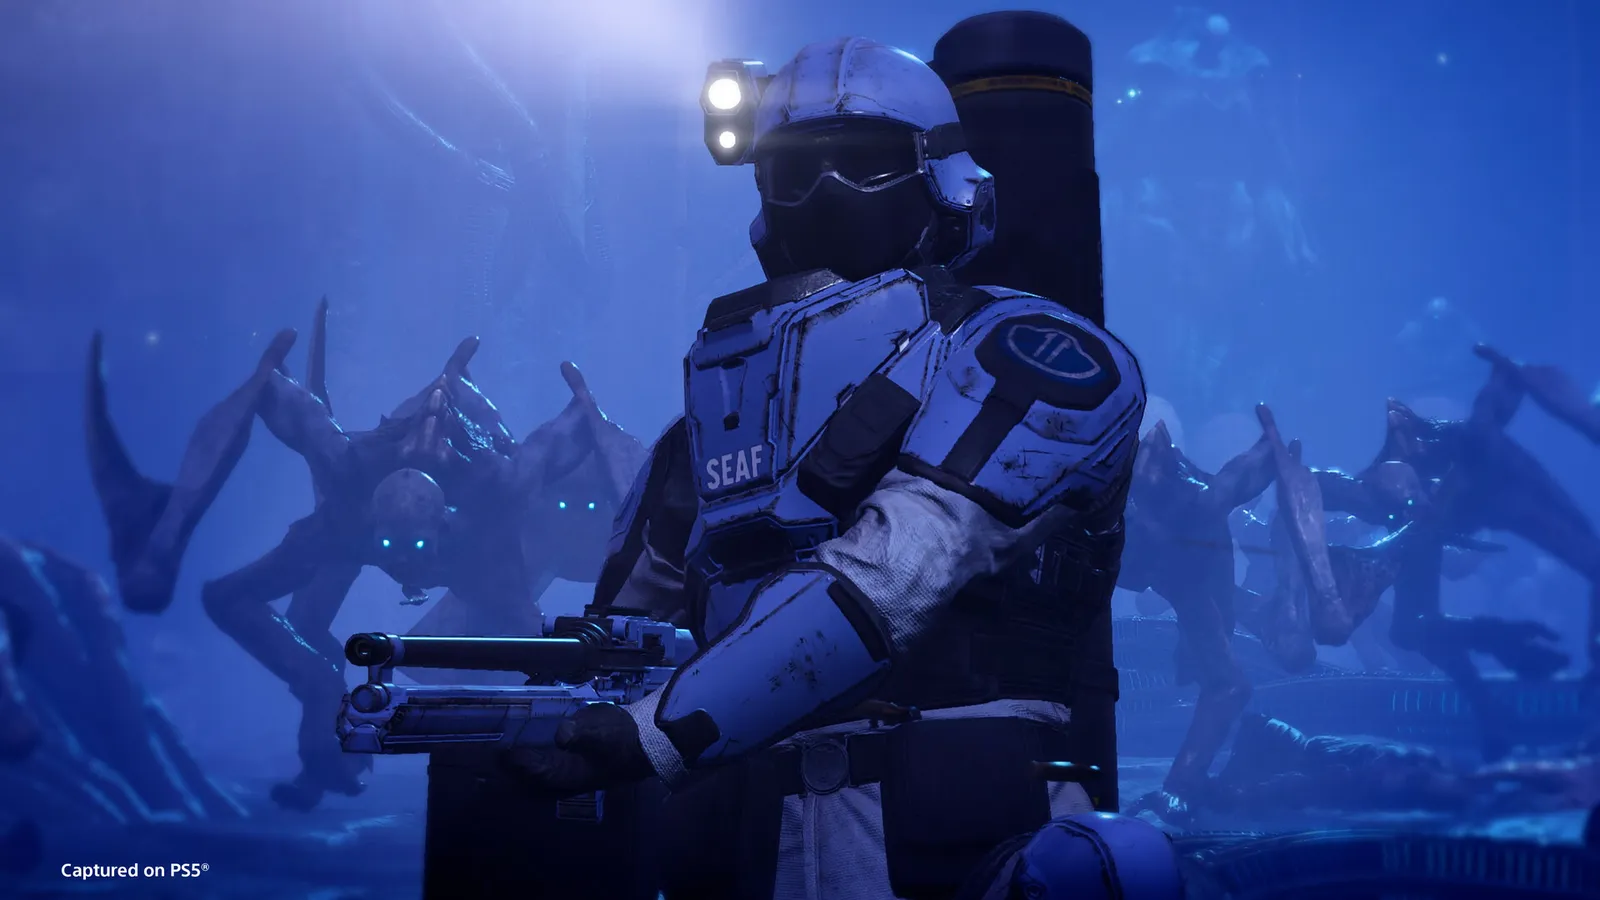
Official resources: Steam store page · Helldivers Wiki (wiki.gg) — Stratagems · IGN — Best Stratagems · IGN — Best Ship Modules · Forbes — Stratagem code list
What Are Stratagems and How Do They Work?
Stratagems are abilities called down from your Super Destroyer during a mission. Each one has a unique directional code — a sequence of 3–8 inputs (up, down, left, right) — that you type with the stratagem menu open, then throw a glowing beacon to mark the target area. The Destroyer then delivers the goods: an orbital bombardment, an Eagle flyover, a Hellpod carrying a support weapon, a sentry turret, a vehicle, or a mission-critical item. They're the other half of your loadout puzzle — the gun in your hands is covered in the best weapons guide.
The core flow:
- Open the stratagem menu — hold CTRL on PC, or the stratagem button on controller (the game shows your four equipped stratagems with their codes on screen).
- Input the code from memory (or glance at the screen). One wrong input and you start over — the game doesn't forgive partial inputs.
- When the code completes, your Helldiver calls it out and you throw the beacon where you want the strike/equipment to land.
- Everything arrives via Hellpod (or a Pelican for vehicles), and the delivery takes a few seconds — during which you're usually standing in the open, which is how most Helldivers die.
The official wiki sums up the hierarchy: stratagems are "considered to be the most powerful tool in a Helldiver's arsenal." You can equip four at a time in your loadout, chosen before deployment on your ship.
In a firefight you won't have time to read the codes. Learn the codes for your four go-to stratagems — the community guide and Forbes' code list both recommend practicing in the ship's "Stratagem Hero" arcade minigame (included with the Super Citizen Edition). Ten minutes there and the inputs become reflex.
The Four Permit Types (Color-Coded)
Stratagems split into four categories, identified by permit type and icon color — per the official Helldivers Wiki:
- Offensive (red) — destruction: Orbital Strikes and Eagle Strikes. Best for killing groups and big targets, and for destroying enemy structures (Fabricators, Spore Spewers, Rogue Research Stations).
- Supply (blue) — equipment that boosts you: Support Weapons, Backpacks and Vehicles.
- Defensive (green) — turrets, mines, and emplacements: Sentries and Emplacements.
- Mission (yellow) — objective tools: Reinforce, Resupply, Hellbomb, SOS Beacon, SSSD Delivery and other mission-specific calls. Reinforce and Resupply are always available regardless of loadout.
The Complete Stratagem List (2026)
As of the Machinery of Oppression era (February–June 2026) the game has grown to more than 80 stratagems — the exact count keeps climbing with every update, and several 6.3 additions (the Supply FRV and Incinerator FRV variants, for example) aren't in older lists at all. Here's the full breakdown by category:
Offensive — Orbital Strikes (12)
Orbital Precision Strike (unlocked from the start) · Orbital Gatling Barrage · Orbital Airburst Strike · Orbital Napalm Barrage · Orbital 120MM HE Barrage · Orbital Walking Barrage · Orbital 380MM HE Barrage · Orbital Railcannon Strike · Orbital Laser · Orbital EMS Strike · Orbital Gas Strike · Orbital Smoke Strike
Orbital strikes take longer to arrive but hit wider and harder than Eagles, and they go on cooldown immediately after impact. Best used against slow, predictable targets — a Bug Breach, an unaware patrol, a base you're about to storm. One quirk: in urban city/factory biomes, the Destroyer may need to reposition to fire, which extends the call-in time.
Offensive — Eagle Strikes (8)
Eagle 500kg Bomb · Eagle Strafing Run · Eagle Airstrike · Eagle Cluster Bomb · Eagle Napalm Strike · Eagle 110MM Rocket Pods · Eagle Smoke Strike · Eagle Rearm (non-loadout, always available)
Eagles are faster and carry multiple uses before rearming: Strafing Run has 3 uses, Cluster Bomb 4, Airstrike 2, 500kg 1. When the payload is spent (or you want it back early), enter the Eagle Rearm code to send the Eagle back to the ship — rearm takes over two minutes, so budget your uses. Direction note: the Eagle drops its payload perpendicular to your throw direction for most strikes, but the Strafing Run and 500kg Bomb run parallel to it — that's why the 500kg "misses" when you throw it wrong.
Supply — Support Weapons (26+)
MG-43 Machine Gun · M-105 Stalwart · MGX-42 Bullet Storm · Heavy Machine Gun · RS-422 Railgun · AWP-1 Anti-Materiel Rifle · GL-21 Grenade Launcher · GR-8 Recoilless Rifle · FAF-14 Spear · EAT (Expendable Anti-Tank) · EAT-411 Leveller · AC-8 Autocannon · Airburst Rocket Launcher · StA-X3 W.A.S.P. Launcher · Commando · Quasar Cannon · Laser Cannon · ARC-3 Arc Thrower · FLAM-40 Flamethrower · Sterilizer · De-Escalator · S-11 Speargun · CQC-20 Breaching Hammer · B/MD C4 Pack · MS-11 Solo Silo · EAT-700 Expendable Napalm
Support weapons are the heavy hitters of a loadout and generally have a 480-second (8-minute) cooldown and 3-second call-in. Some require a backpack for ammo (Autocannon, Recoilless, Spear) — and if an ally is nearby they can crew-load you, massively speeding up reloads.
Supply — Backpacks (10)
B-1 Supply Pack · Jump Pack · Hover Pack · Shield Generator Pack · Directional Shield · Ballistic Shield Backpack · Guard Dog (standard) · Guard Dog Rover (laser) · Guard Dog Dog Breath (gas) · Portable Hellbomb
Backpacks trade your support-weapon backpack slot for utility. The Supply Pack is the team-favorite (4,000 Requisition Slips, Level 2); the Jump Pack (6,000, Level 8) is the mobility pick; the Shield Generator Pack is the survival pick on high difficulties. Don't bring a backpack stratagem AND a backpack-hungry support weapon — you can only carry one.
Supply — Vehicles (6)
Fast Recon Vehicle (FRV) · Supply FRV · Incinerator FRV · Patriot Exosuit · Emancipator Exosuit · EXO-51 Lumberer · Bastion Tank
Vehicles arrived after launch: the FRV with Omens of Tyranny (December 2024), the Exosuits at various points, and the Bastion — a four-man armored tank destroyer — with the 2026 updates. The 6.3 patch rebalanced vehicle armor values (Bastion counts as heavy armor now), and enemies received AP buffs to counter them.
Defensive — Sentries (8)
A/MG-43 Machine Gun Sentry · A/G-16 Gatling Sentry · A/AC-8 Autocannon Sentry · A/MLS-4X Rocket Sentry · A/M-12 Mortar Sentry · A/EMS-4 Mortar Sentry · A/FLAM-40 Flame Sentry · Shield Generator Relay
Sentries are auto-turrets with limited ammo; most have a 180-second cooldown. They're the single best force multiplier in defensive missions — four players can deploy four machine gun sentries and hold a choke point nobody could hold alone.
Defensive — Emplacements (7)
HMG Emplacement · E/AT-12 Anti-Tank Emplacement · E/GL-21 Grenadier Battlement · Tesla Tower · Anti-Personnel Minefield · Incendiary Mines · Anti-Tank Mines · Gas Mines
Emplacements are deployable positions and area denial. The Grenadier Battlement (a wall with a 60-round grenade launcher) and the Anti-Tank Emplacement (added with Omens of Tyranny specifically to fight Illuminate ships) are the standouts.
Mission Stratagems (12+)
Reinforce · Resupply · SOS Beacon · Hellbomb · SSSD Delivery · Seismic Probe · Upload Data · Eagle Rearm · SEAF Artillery · Super Earth Flag · Hive Breaker Drill · One True Flag
Mission stratagems are mostly objective tools that appear contextually — the ones you always have are Reinforce (call back a fallen squadmate) and Resupply (shared ammo/health drop on a cooldown everyone in the squad shares). Using Resupply doesn't cost a loadout slot, but its cooldown is shared by the whole team.
How to Unlock Stratagems: The Full Economy
Stratagems unlock through three channels (per the official wiki), plus temporary grants:
Official source: Xbox Wire — Machinery of Oppression — "Machinery of Oppression, the latest major update to Helldivers 2, arrives today on Xbox Series X|S," adding the Cyborg Vox Engine and new missions that expand how stratagems are used in the Galactic War.
- Patriotic Administration Center (PAC) — the main shop on your ship. Buy permanent stratagems with Requisition Slips (the mission currency) once you hit the required character level. Examples: Machine Gun Sentry at Level 2, Expendable Anti-Tank at Level 3, Grenade Launcher and Recoilless Rifle at Level 5, Autocannon at Level 10 for 7,000 slips, Eagle 500kg at Level 15 for 10,000 slips.
- Warbonds — the battle-pass-style reward tracks. Some stratagems (like the Guard Dog variants and vehicle patterns) live in Warbond pages and cost Medals to unlock; the Warbond itself costs 1,000 Super Credits (Premium) or 1,500 (Legendary crossover).
- Major Orders and Campaigns — rare stratagems and gear have been granted as rewards for completing the community-wide Major Orders and, since the June 2026 Galactic Campaigns system, campaign objectives.
- Temporary permits — missions sometimes grant "Weapons Augmentation" stratagems for that operation only.
Requisition Slips come from mission completion, loot containers and side objectives. Higher difficulties multiply the payout — up to a 250% multiplier on Helldive difficulty, which is why farming high-difficulty blitz missions is the standard slip-grind.
Every stratagem that shipped with the game in February 2024 can be bought by character Level 20. Everything past that comes from Warbonds and updates, so Level 20 is the practical "full arsenal" milestone for the core system — after that it's about Medals and Super Credits.
Call-In Times and Cooldowns: The Numbers
| Stratagem type | Call-in time | Cooldown | Notes |
|---|---|---|---|
| Orbital Precision Strike | ~3s | 100s | Starts unlocked; the workhorse |
| Orbital barrages (120/380/walking) | 5s+ | 180s+ | Bigger area, bigger risk |
| Orbital Laser | 1s | long (3 uses) | Deletes everything in a line |
| Orbital Railcannon | ~2s | 180s | Auto-targets the biggest enemy; one-shots Bile Titans and Hulks; buffed in 6.3 vs Vox Engines |
| Eagle strikes | 0s | Rearm 2min+ | Multiple uses, then rearm |
| Support weapons | 3s | 480s | 8-minute cooldown; don't lose them |
| Sentries | 3s | 180s | Ammo-limited, auto-fire |
| Emplacements | 3s | 180s+ | Operator-based |
| Resupply | ~3s | Shared, ~3-4min | One per squad, shared cooldown |
| Reinforce | instant | 1-2s | Always available, limited uses per mission |
Ship Modules: The Upgrade Layer
Beyond unlocks, Ship Modules permanently upgrade your stratagems. There were 18 at launch, bought with Samples — Common (green), Rare (orange) and Super (pink) samples dropped from missions at higher difficulties. Per IGN's guide and the wiki, the priority order for most players:
- Donation Access License (60 Common) — all support weapons get more magazines. Universally useful, cheap.
- Targeting Software (60 Common) — orbital deployment time −1 second. The Precision Strike you start with gets noticeably faster.
- Liquid-Ventilated Cockpit (80 Common) — Eagle cooldown −50%. The single biggest quality-of-life upgrade for Eagle mains.
- Synthetic Supplementation (60 Common + 10 Rare) — sentry/emplacement/resupply cooldown −10%.
- Dynamic Tracking (60 Common + 20 Rare) — sentry deployment time reduced.
- Expanded Weapons Bay (80 Common + 80 Rare + 10 Super) — Eagle gets +1 use per rearm. End-game goal.
Samples are account-wide progression: failed missions lose unextracted samples, so extracting with your samples matters more than mission completion on farming runs. Sample-hunting is a lot smoother with a full cross-platform squad — if you're still recruiting, the crossplay guide covers how mixed-platform teams set up. The full Ship Modules breakdown lives in our guide references, but the rule of thumb is: Eagle cooldown and support-weapon magazines first, sentry stuff second, everything else third.
Best Stratagems for Beginners (Unlock Order)
Based on IGN's Best Stratagems guide plus community consensus, here's the exact unlock path for new players (Levels 1–5):
- Orbital Precision Strike (free) — take it on almost every mission early; 100s cooldown, kills bug holes and softens Chargers.
- A/MG-43 Machine Gun Sentry (Level 2) — 3s deploy, 180s cooldown, holds flanks solo or in a team.
- B-1 Supply Pack (Level 2, 4,000 slips) — at least one per squad; ammo is the real resource.
- M-105 Stalwart (early) — light machine gun with huge mags, reload-while-moving; carries the first 10 levels.
- Expendable Anti-Tank (Level 3) — two disposable rocket shots per call; your first Charger solution.
- Eagle Airstrike (early) — instant call-in, 2 uses, carpet of explosions; the best early Eagle.
- Orbital Gas Strike (early) — area denial that makes enemies attack each other.
- GR-8 Recoilless Rifle (Level 5) — your first real anti-tank; bring a teammate for crew-load.
After Level 5, move to the mid-game list: Orbital EMS Strike (stuns even Chargers), Eagle Napalm Airstrike, Autocannon (Level 10), Gatling Sentry, Grenade Launcher, and the Guard Dog Rover. At Level 15+ go for the late-game monsters: Eagle 500kg, Railgun, Orbital Railcannon, Orbital Laser, Shield Generator Pack, Quasar Cannon, Spear, Rocket Sentry, Anti-Tank Emplacement.
Four players all bringing Orbital Barrages is how squads wipe. Divide roles: one anti-tank (Recoilless/EAT/Quasar), one crowd control (Napalm/Gas/sentry), one support (Supply Pack or Shield Pack), one structure killer (500kg/Grenade Launcher). Communicate your four picks before deploying — it's the single highest-impact coordination habit in the game.
Best Stratagems by Faction (2026)
Terminids (bugs)
Bug breaches and heavy armored units are the threats. Top picks: Orbital Precision Strike (kills nests), Orbital Napalm Barrage and Eagle Napalm Strike (hold breach points), Autocannon (medium armor + crowd), Grenade Launcher (bug holes), Mortar Sentry (arcs fire over cover), Expendable Anti-Tank / Recoilless (Chargers and Bile Titans), Jump Pack (escape Charger charges — the classic bug-escape tool).
Automatons (bots)
Bots shoot back and call dropships. Top picks: Eagle Airstrike and 500kg (delete dropship landings), Orbital Walking Barrage (predictable rolling bombardment for bases — IGN notes it's the one barrage your team can safely follow), Railgun and Recoilless (Hulks and Tanks), Anti-Materiel Rifle (Devastator headshots), Shield Generator Pack (survive sustained fire), Rocket Sentry (anti-armor support fire), Tesla Tower (choke-point denial).
Illuminate (squids)
Shielded ships and Voteless hordes. Top picks: Anti-Tank Emplacement (added for exactly this — shreds Warp Ships), Quasar Cannon / EAT (shielded Harvesters), Orbital Laser (sweeps the streets), Arc Thrower (chain lightning, no ammo — great in urban chokepoints), Flame Sentry / Torcher-style fire (Voteless melt), Grenade Launcher (crowds + ships), Mortar Sentry (fires over buildings).
AC-8 Autocannon + Supply Pack + Machine Gun Sentry + Orbital Precision Strike is the community's "works everywhere" loadout — it has anti-tank, anti-crowd, sustain and objective tools, and it's 95% as good against bugs, bots and squids. Master that and you'll never feel locked out of a faction. (For the primaries that pair best with it, see the best weapons tier list.)
Common Stratagem Mistakes (and Fixes)
- Losing your support weapon — 480s cooldown means losing the Autocannon is losing the mission's punch. If you must leave it, note the location; the team can recover it.
- Team-killing with barrages — 380MM and Napalm don't care about team colors. Throw barrages away from the objective, not at it, and never under your own sentry.
- Resupply spam — the Resupply cooldown is squad-shared. One person calling it in a panic starves the whole team.
- Standing still during call-in — the 3-second Hellpod window is prime Charger-charge time. Call support weapons from cover or behind a sentry.
- Wrong Eagle direction — the Strafing Run and 500kg drop parallel to your throw; the rest drop perpendicular. Account for it or you'll "miss" a stationary target.
- Ignoring samples — Ship Modules are stat boosts hiding in plain sight; extract with samples on every run.
Frequently Asked Questions
What are stratagems in Helldivers 2?
Stratagems are the abilities called down from your Super Destroyer: orbital strikes, Eagle airstrikes, support weapons, backpacks, vehicles, sentries, mines and mission tools. You equip four per loadout and call them in by typing a directional code and throwing a beacon.
How do you use and call in stratagems?
Open the stratagem menu (hold CTRL on PC or the stratagem button on controller), input the directional code, then throw the beacon to mark the target. The Destroyer delivers via Hellpod after a few seconds. One wrong code input resets the sequence.
How do you unlock stratagems in Helldivers 2?
Mostly by buying them in the Patriotic Administration Center with Requisition Slips (mission currency) at set character levels — all launch stratagems unlock by Level 20. Others come from Warbonds (Medals + Super Credits) and Major Order/Campaign rewards. Ship Modules then upgrade them using samples.
What are the best stratagems in Helldivers 2?
For beginners: Orbital Precision Strike, Machine Gun Sentry, Supply Pack, Expendable Anti-Tank, Eagle Airstrike. All-around endgame: AC-8 Autocannon, Orbital Railcannon Strike, Eagle 500kg, Orbital Laser, Shield Generator Pack, Quasar Cannon. Per-faction picks are in the section above.
How many stratagems are in Helldivers 2?
More than 80 as of mid-2026, including roughly 12 orbitals, 8 Eagle strikes, 26+ support weapons, 10 backpacks, 7 vehicles, 8 sentries, 7 emplacements and 12+ mission stratagems. New ones arrive with every major update, so the count keeps growing.
Related Guides
- Is Helldivers 2 Crossplay? — Cross-Platform Guide
- Helldivers 2 Best Weapons — 2026 Tier List
- Risk of Rain 2 Items and Bosses Guide
- Destiny 2 Dungeons Guide
- Warframe — All Warframes Guide
- Monster Hunter Wilds Crossplay Guide
Last updated: August 13, 2026.
More Helldivers 2 Guides
Helldivers 2 Avengement Day explained: the annual in-game holiday Arrowhead declared after the community liberated Seyshel Beach from the Illuminate in 2025.
Helldivers 2 best armor in 2026: armor passives ranked, the Democracy Protects and Siege-Ready picks, and which armor sets to unlock first.
Helldivers 2 best weapons in 2026: the primary and support weapon tier list after Update 6.3, ranked per faction, with stats and what to buy first.
Bile Titans in Helldivers 2: weak points (head, underbelly sacs), best weapons and stratagems, spawn difficulties, and how to survive Terminid heavies.
Helldivers 2 boosters explained: the full list with effects and Warbonds, how unlocks work, the best boosters for each faction, and which to skip.
Helldivers 2 builds for 2026: complete loadouts for Terminids, Automatons and Illuminate — weapons, armor passives and stratagems per role.
Helldivers 2 Cheat Engine use explained: how GameGuard detects it, the real ban risk, what the cheat tables do, and the legal modding alternatives.
Helldivers 2 crashing on PC? 12 fixes for crash-on-launch, won't-launch Steam errors, the 0x44415441 mod crash, and the prod_slim beta.