
Risk of Rain 2 items and bosses guide: 300+ items across seven rarities, best builds, every boss from Beetle Queen to Mithrix and the endgame.
Items Risk of Rain 2 Guide — Best Items, All Bosses & Looping
The short version: all of Risk of Rain 2's growth comes from items — roughly 300+ items (including equipment) by 2026 (200+ base, each of the 3 DLCs adding dozens more), and bosses run from Stage 1 elites all the way up to Mithrix, Voidling, False Son and Solus Wing/Solus Heart. The actual skill is knowing what to stack: commit to one damage theme (bleed, crit, or chain) and pour every pickup into it, instead of spreading thin across five different effects. This guide covers the item economy, the best-in-slot combos, the full boss list, and how the loop changes everything.
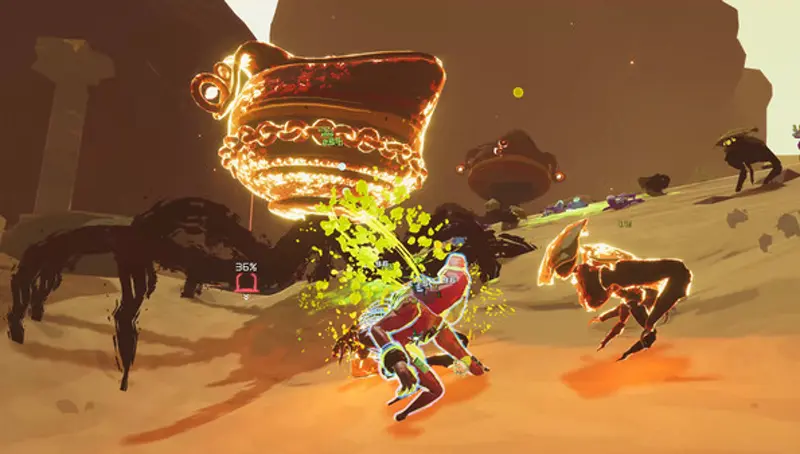
Official resources: Steam store page · IGN Wiki: Items & Equipment · Official Wiki: The Planetarium · Wikipedia
The Item Economy: Seven Rarities and How Stacking Works
| Rarity | Color | Source | What it does |
|---|---|---|---|
| Common | White | Chests/drops | Flat stats, your stacking workhorse |
| Uncommon | Green | Chests/drops | The effect core |
| Legendary | Red | Rare chests/specific sources | Build-defining |
| Boss | Yellow | Boss drops | Unique boss effects |
| Lunar | Blue | Bazaar (lunar coins) | High reward, high cost |
| Void | Purple | SotV DLC | Replaces its base item on pickup |
| Equipment | Orange | Everywhere | Your one active item slot |
Stacking rules: the same item stacks infinitely (linearly or multiplicatively). Community consensus: a 5-10 stack of one themed item forms a real "damage engine," and beats five random one-offs. Items only enter the drop pool once you've unlocked them via challenges — that's what drives the unlock grind.
Training bleed? Only take Tri-Tip Daggers. Training crit? Stack crit glasses until 10 (100% crit). Switching themes mid-run means throwing away everything you've built.
The Best Items (Community Consensus, 2026)
Whites (early game backbone)
- Tri-Tip Dagger: bleed chance, the most universally useful white damage source
- Lens-Maker's Glasses (crit glasses): 10 stacks = guaranteed crits; the foundation of every crit build
- Soldier's Syringe: attack speed, useful on literally everyone
- Medkit / Monster Tooth: sustain
Greens
- Ukulele: chain lightning — the king of greens
- ATG Missile: free rockets on hit
- Will-o'-the-wisp: kill explosion
- Paul's Goat Hoof: movement speed (the most underrated stat in the game)
Reds
- 57 Leaf Clover: the community's #1 — +1 luck on all your procs, so every chance-based item gets stronger
- Behemoth: attacks explode
- Bustling Fungus: stand-still healing, the core of the Engineer cheese build
Blues / Purples
- Gesture of the Drowned (lunar): auto-triggers your equipment, a classic combo piece
- Void Items: replace their base item on pickup — usually stronger but restructure your build; mind the conflicts with base items
The Complete Boss List
Regular Bosses (stage events)
| Boss | Appears | Notes |
|---|---|---|
| Beetle Queen | Stage 1-2 | Spawns small beetles — clear the adds first |
| Wandering Vagrant | Stage 1-2 | Energy-ball bombardier; keep your distance |
| Stone Titan | Stage 3 | Chest weak point; strafe the laser |
| Aurelionite | Rare | Golden Stone Titan, drops a red item |
| Imp Overlord | Stage 4 | Fast blades; watch the dash |
| Alloy Worship Unit | Siren's Call | Loader's unlock boss (see the characters guide) |
Final and Hidden Bosses
- Mithrix (Commencement): the main final boss, four phases; phase 4 steals every item you own — it's scripted, don't panic, win it with positioning and dodging
- Voidling (The Planetarium, SotV): the hidden final boss, skill ceiling of the game; killing it unlocks Railgunner
- False Son (SOTS): the DLC's main-story villain boss, mechanic-heavy and hits hard
- Solus Amalgamator / Alloy Hunter (Alloyed): mid-DLC bosses for the new expansion
- Solus Wing / Solus Heart (Alloyed): the twin final bosses — Alloyed Collective's graduation test
- Twisted Scavenger (A Moment, Whole): hidden-stage boss, drops special items
After your items are confiscated, your DPS falls off a cliff and trading blows = death. The right play is to create distance, kite around pillars, and punish his attack recovery — phase 4 is a positioning test, not a DPS test.
Looping and the Endgame: How You Keep Getting Stronger
- Looping: after Stage 5, skip Commencement and head back to Stage 1 — difficulty keeps rising. Each loop inflates enemy HP and spawn counts, and your build has to keep pace
- The god build idea: after 2-3 loops, a 20+ stack of one themed item plus your red combo (57 Leaf Clover + bleed/crit) is the standard graduation form
- Lunar coin snowball: convert coins into key lunar gear (like Gesture) at the Bazaar, feeding a Newt Altar every stage for guaranteed entries
- The Planetarium route: runs aimed at the Voidling should prioritize Void Locus signal-clearing (entry conditions in the stages and maps guide)
Plenty of people take the Stage 5 portal straight into Commencement for speedruns — looping is the "get stronger, fight scarier bosses" route, and both are valid. For challenge unlocks like Mercenary's True Respite, looping is mandatory.
Ending Messages and Echo-Egg Lore
- Ending Messages: the win/annihilation text changes with survivor and conditions — collectors rerun for all of them
- Echo items: Her Biting Embrace, His Reassurance and friends tie directly into the story (the Providence/Mithrix brother plotline)
- You Hear Thunder Rumbling: REX-related log text, a favorite of community lore-hunters
- Networked Suffering: Alloyed Collective's new item, keeping the expansion's "collective suffering" theme
- Full lore breakdown in the original game guide (Providence/Mithrix/Petrichor V, start to finish)
Frequently Asked Questions
How many items are in Risk of Rain 2?
About 200+ in the base game (with equipment), roughly 300+ including all 3 DLCs; the count grows with updates, and the official Wiki is the source of truth for exact numbers.
What are the strongest items?
57 Leaf Clover (best red), Tri-Tip Dagger / crit glasses (white foundations), Ukulele (best green); Void Items are generally stronger than their base versions but restructure your build.
Who is the hardest boss?
The Planetarium's Voidling and Mithrix phase 4 are the joint hardest; Alloyed Collective's Solus Wing/Solus Heart is the newest graduation challenge.
How do Void Items work?
Purple items from SotV: picking one up replaces its same-named base item (removing that item's stacks). Usually stronger, but they can't coexist with the base item.
How do you handle Mithrix phase 4?
After he steals your items, win with positioning: keep distance, use pillars, punish his recovery windows. Phase 4 is about movement, not damage.
How do I loop?
After the Stage 5 teleporter event, skip Commencement and enter the next portal — you loop back to Stage 1 with difficulty and rewards scaling up.
Related Guides
- Risk of Rain 2 Stages & Maps Guide — Every Environment in Order
- Risk of Rain 2 Beginner's Guide — How to Play, Items, Loops & Multiplayer
- Risk of Rain 2 Characters Guide — All 18 Survivors, Unlocks & the Best Picks
- Risk of Rain 2 DLC Guide — All 3 Expansions & What's Next (2026)
- Risk of Rain 2 Original Game Guide — RoR1 Maps & How It Connects to RoR2
Last updated: August 12, 2026.