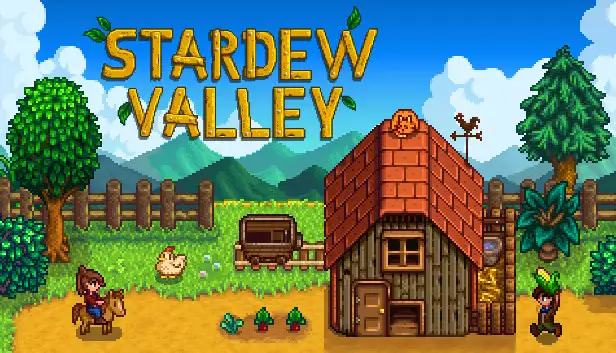
Complete Stardew Valley farm guide: layout planning (sprinkler grids, paths), every farm building with unlock timing, and animal order from chicken to pig.
Stardew Valley Farm Guide — Farm System, Layout, Buildings and Animals
The farm in Stardew Valley isn't scenery — it's the engine the whole game runs on. The 63×43 plot of overgrown land you inherit decides how you spend every in-game day from the moment you step off the bus. If you searched "stardew valley farm," you probably want three things answered: which map to pick, how to arrange it, and when to build what. This guide covers all three in that order, including the sprinkler grids, building spacing, and silo rules that veteran players only learn after restarting once or twice.

Official resources: Steam Store Page · IGN Game Page · Official Site · Official Wiki: Farm · Wikipedia
How the Farm System Actually Works
Before touching layout, get the big picture. A Stardew day (6:00 AM to 2:00 AM) revolves around the farm: water crops and harvest → feed animals and collect produce → process artisan goods → then use the leftover time for the outside world (mines, fishing, socializing). Every hour you automate away is an hour you can spend on the things that actually move your farm forward, which is why sprinklers are the single most important upgrade in the game — more on that below.
The core parts of any farm:
| Part | Purpose | Notes |
|---|---|---|
| Crop fields | Seasonal crop rotation | One 28-day cycle per season, spring to winter |
| Animal area | Coop/barn plus fenced pasture | Keep it away from crops — animals trample |
| Artisan area | Kegs, mayo machines, cheese presses, bee houses | Roughly doubles your profits |
| Greenhouse | Four-season growing, late-game income | Unlocked via the Community Center bundles |
| Storage & processing | Chests, mill, furnace, charcoal kiln | Park it in a corner you won't need later |
Before sprinklers, watering 60 tiles eats most of your morning (2 energy per tile). That's why your first two springs should lean under-planted, not over-planted — start with 30-40 tiles and only expand past 100 once Quality Sprinklers (farming level 6) arrive. For the actual profit math on every crop, see our farming and profit guide.
Farm Maps: One Choice That Shapes the Whole Run
You pick your farm map when creating your character, and you cannot change it later. There are 8 maps (Meadowlands arrived in 1.6), each with its own gimmick. The official Wiki's Farm Maps page has the full data; here's the short version:
| Map | Unique Feature | Best For |
|---|---|---|
| Standard | Most tillable tiles (3,427, largest single block 63×31) | New players — the most balanced pick |
| Riverland | Starts with a fish smoker, 70% town river fish, bubble spots everywhere | Fishing mains |
| Forest | Daily hardwood stumps and forage; grassy southern grove | Foraging / hardwood needs |
| Hill-top | Small quarry on the property (stone/ore) | Miners |
| Wilderness | Night monsters spawn on the farm (combat XP at 1/3 rate) | Combat-oriented challenge runs |
| Four Corners | Four sections, each with a different gimmick | Multiplayer — one player per quadrant |
| Beach (1.5) | Ocean driftwood and supply crates, but sprinklers don't work on sand | Veteran challenge, fishing/foraging |
| Meadowlands (1.6) | Starts with a coop and 2 Blue Chickens, rich pasture | Animal-focused farms |
Picking advice: just take Standard for your first farm. It's balanced and has the most tillable land, which means the most forgiveness early on. Fishing addicts should grab Riverland, co-op groups want Four Corners, and Beach/Meadowlands are for people who want a challenge. Every map's full comparison — from map choice to layout templates to its unique playstyle — is in the farm maps guide.
Riverland, Forest, Hill-top, Wilderness, and Beach all have 30-50% less tillable land than Standard. That's fine in year one and a real problem in year two when you want to mass-produce wine. "Pick a map" really means "pick a playstyle," not "pick a pretty background."
Layout: Three Rules You'll Regret Breaking
There's no single best layout, but there are three rules. Violate any of them and you'll feel it by year two:
1. Plan around the sprinkler grid (5×5 Iridium Sprinklers). Sprinklers are the ruler you lay out the farm with. Quality Sprinklers (8 tiles) like a 5-wide strip; Iridium Sprinklers (24 tiles, 5×5) cover exactly 25 tiles. Reserve land in multiples of 5 from day one — otherwise swapping to iridium later means re-hoeing everything. The hoe's charged swing covers exactly 5×5, which matches the iridium grid perfectly and keeps you efficient.
2. Building spacing (at least 2 tiles). The classic new-player mistake: cramming coops and barns together to "save space." Then there's no room for paths, fences, or expansion, and you're paying Robin big money to move buildings. Rule: leave 2 tiles around every building for walkways, fencing, sprinkler lines, and future upgrades.
3. Paths (dirt paths to start). Walking time is real time. Lay dirt paths (free to craft — just stone and wood) between your fields, animal area, barn, and front door. Over a year it saves dozens of in-game hours. Upgrade to stone or wood flooring later if you want it prettier.
When you open the doors, animals wander and trample nearby crops. Put coops/barns in a farm corner and fence the pasture so animals stay in their own territory. Fences rot over time — the Gold Clock stops that permanently.
The Sprinkler Revolution: When to Upgrade, and To What
Three tiers of sprinklers, straight from the official Wiki: Crafting:
| Sprinkler | Coverage | Unlock | Recipe | Verdict |
|---|---|---|---|---|
| Basic Sprinkler | 4 tiles | Farming level 2 | Copper + Iron bars | Trash — skip it |
| Quality Sprinkler | 8 tiles | Farming level 6 | Iron + Gold bars + Refined Quartz | First real power spike |
| Iridium Sprinkler | 24 tiles (5×5) | Farming level 9 | Gold + Iridium bars + Battery Pack | Endgame — one covers a field |
The key milestone: hit farming level 6 (roughly mid-summer — just plant and harvest a lot) and craft your first batch of Quality Sprinklers. Your morning goes from "40 minutes of watering" to "5 minutes of harvesting." Iridium Sprinklers can also be bought from Krobus in the sewers every Friday for 10,000g — the fastest source once money is flowing, and the traveling cart sometimes stocks them too.
Quality Sprinklers need Refined Quartz (1 quartz + 1 coal in a furnace). Coal is tight early, but the Recycling Machine (fishing level 4) turns driftwood and broken CDs into Refined Quartz directly — way better value than burning coal. Feed every piece of fishing trash you find into one.
Farm Buildings: Order and Timing
All buildings come from Robin's carpenter shop (she has to start the job; construction finishes the next day or a few days later). Recommended order:
- Silo (100g + 100 stone + 10 clay + 5 copper bars) — priority one. Grass you cut on your own land automatically becomes hay in the silo, and winter survival depends on it. Raising animals without a silo means starving them in winter. Build the silo before any animal building — the official Wiki: Buildings page recommends the same.
- Coop (4,000g + 300 wood + 100 stone) — mid-spring. Chickens are cheap, and mayo machines (farming level 1) turn eggs into ~190g a day — the steadiest early cash flow in the game.
- Barn (6,000g + 350 wood + 150 stone) — late summer/early fall. Cows produce milk for cheese presses (farming level 6); pigs (after the barn upgrade) dig up truffles, which become the big earner of fall and winter.
- Greenhouse (Community Center bundle reward) — around the start of year two. Year-round Starfruit or Blueberry is the core of the "grow and brew" strategy; it's also where you grow beets for sugar (see the sugar guide).
- Shed (15,000g + 300 wood) — mid-game artisan builds. Fill it with kegs and preserves jars; the Big Shed upgrade doubles the space.
- Fish Pond (5,000g + 200 stone + 5 seaweed + 5 green algae) — build early if you like fishing; Lava Eels and Blobfish produce high-value goods.
The classic new-player burn: dumping gold and materials into the Stable (10,000g) and house renovations, then pushing the greenhouse and barn upgrades into year two. Always prioritize functional buildings. The Stable is nice, but your farm is small for the first two seasons — walking isn't that expensive yet.
Animals: The Full Order From Chicken to Pig
- Year 1 spring: chickens (buy 4, cash them out through mayo machines) → summer cows (cheese) and a coop upgrade for ducks
- Year 1 fall: upgrade the barn → pigs (each digs up 1-3 truffles a day; with the Gatherer profession plus Botanist skill they're all iridium quality, 1,000g+ a day)
- Year 2: ostriches (unlocked via Ginger Island expeditions), Blue Chickens (Meadowlands start or the heart-event easter egg), goats/sheep as you feel like it
- Year-round rule: the silo must be full before winter. If hay is short, plant grass starters in a fenced plot and harvest it, or just buy hay from Marnie (50g per bale)
Picking the Meadowlands map starts you with a coop and 2 Blue Chickens (they lay blue eggs, and the mayo is blue too). The whole first-year animal grind gets much lighter — full details in the farm maps guide.
The Greenhouse and Late-Game Farm: Where the Money Comes From
The greenhouse (repaired by the Junimos after you finish the Pantry bundles) is your farm's second income engine: 12×12 tiles you can plant in any season. The mainstream plays are Starfruit (ferment it into Starfruit Wine in kegs, 2,250g+ a bottle) or Blueberry (rock-steady per-tile yearly income). The greenhouse is also the right home for beets — mill them into sugar for cooking (see the sugar guide) — or gift crops you need all year (coffee beans, honey flowers).
Four big late-game purchases:
- Obelisks (500,000g each): earth, water, desert, and island variants teleport you to their region instantly — the biggest quality-of-life spend in the game
- Gold Clock (10,000,000g): fences never rot and farm debris stops spawning — pure flex, but a real automation finish line
- Junimo Huts: little spirits harvest mature crops automatically (place a gem to pick their color) — pair with sprinklers for a fully hands-free farm
- The Ginger Island farm: a second tillable area (1.5+) with year-round growing season — planting it with Pineapple/Starfruit is the main late-game income source
Experienced players structure the farm in modules: crop module (sprinkler grid + Junimo hut), artisan module (shed + keg matrix), animal module (pasture + auto-gates), resource module (tree farm / bee hives / fish ponds). Each module is self-contained and connected by paths — expanding one never touches the others, so the change cost stays low. Once Ginger Island unlocks, you can copy the same modules over wholesale.
The Most Common Farm Mistakes (and How to Avoid Them)
Even with a good plan, most players hit the same wall in year one. If any of these sound familiar, you're in good company:
- Over-planting in spring. You get 270 energy, watering costs 2 per tile, and every extra row means a collapsed afternoon. Thirty to forty tiles is the right number for your first spring; the field can wait for sprinklers.
- Selling every crop and forage item. The Community Center bundles eat specific seasonal crops (Parsnip, Green Bean, Cauliflower, Potato for spring alone). Sell your surplus, but keep at least one of everything until you know it isn't bundle material — otherwise you're waiting a full year for spring to come back around. See the beginners guide for the full first-spring plan.
- Building the barn before the silo. Hay doesn't exist in winter unless you have storage for it. The 100g silo is cheaper than the heartbreak of a starving cow.
- Upgrading tools in the wrong order. The watering can and pickaxe matter far more than the axe early on. Watering can upgrades save energy every single day; the axe only matters for the farm and forest hardwood.
- Ignoring the greenhouse until year two. The greenhouse isn't a "later" project — it's the key that turns your farm from seasonal into year-round income. Prioritize the Pantry bundles (especially the quality crops bundle, which can stall you if you forget to save gold-star produce).
- Spending first gold on the Stable. 10,000g for a horse is tempting, but in season one that money is better spent on seeds, backpack upgrades, or barn/coop expansion. The horse becomes a great buy in year two when your farm is genuinely big.
Year Two and Beyond: When the Farm Pays You Back
Once the iridium grid is down and the greenhouse runs year-round, the farm stops being a chore and becomes a resource machine. A typical veteran day looks nothing like a new player's: morning harvest takes minutes instead of hours, kegs and preserve jars are checked once a day, and most of your time goes to the mines, Ginger Island, or socializing. That's the whole point of the system this guide walks through — the farm is the foundation, and everything else is built on top of it.
If you're coming from a fresh save and want the exact first-week routine (crops, tool upgrades, and the community center timeline), the beginners guide takes it from day one. For the seasonal crop math and fertilizer choices, the farming guide has the numbers.
The New Player to Veteran Farm Timeline
- Year 1 spring: clear land, plant parsnips and potatoes, build the silo and coop
- Year 1 summer: Quality Sprinklers come online, fields expand past 100 tiles, start banking iridium (mines below floor 40)
- Year 1 fall-winter: barn and pigs in place, greenhouse unlocked, switch to the grow-and-brew / artisan flow
- Year 2: Iridium Sprinklers everywhere, greenhouse running year-round, farm scale multiplies after Ginger Island
By this stage the farm has gone from "scraping by" to "printing money," and the game becomes layout beautification and self-imposed challenges. For the crop-profit math, read the farming and profit guide; for the story side — Community Center and the Junimos — see the lore and world guide.
Frequently Asked Questions
Which farm map should a new player pick?
The Standard map — most tillable land (3,427 tiles), most balanced, most forgiving. Fishing mains take Riverland, co-op groups take Four Corners, veterans who want a challenge take Beach or Meadowlands. Full map analysis in the farm maps guide.
How do I plan an efficient farm layout?
Three rules: reserve land in 5×5 blocks for the iridium sprinkler grid (the charged hoe swing matches), leave 2 tiles of space around every building, and connect everything with paths. Fence the animal zone in a corner, away from crops.
When should I upgrade my sprinklers?
Farming level 6 unlocks Quality Sprinklers (8 tiles) — that's the first real power spike, aim for it by mid-summer of year one. Level 9 gives Iridium Sprinklers (24 tiles); you can also buy them from Krobus in the sewers every Friday for 10,000g.
Should I get chickens or cows first?
Chickens first (cheap, and mayo machines pay them off fast), then cows for cheese. Pigs come in fall after the barn upgrade — truffles are one of the biggest year-round income sources in the game.
How much space do I need between farm buildings?
At least 2 tiles. Tight buildings leave no room for paths, fences, sprinkler lines, or upgrades — and moving a building later costs real gold.
Related Guides
- Stardew Valley Lore Guide — Junimos, Joja and Hidden Stories
- Stardew Valley Steam Deck — Verified & Performance Settings
- Earthquake Stardew Valley Guide — Year 1 Event & Railroad
- Stardew Valley Wiki Guide — Official Wiki & Best Resources
Last updated: August 12, 2026.